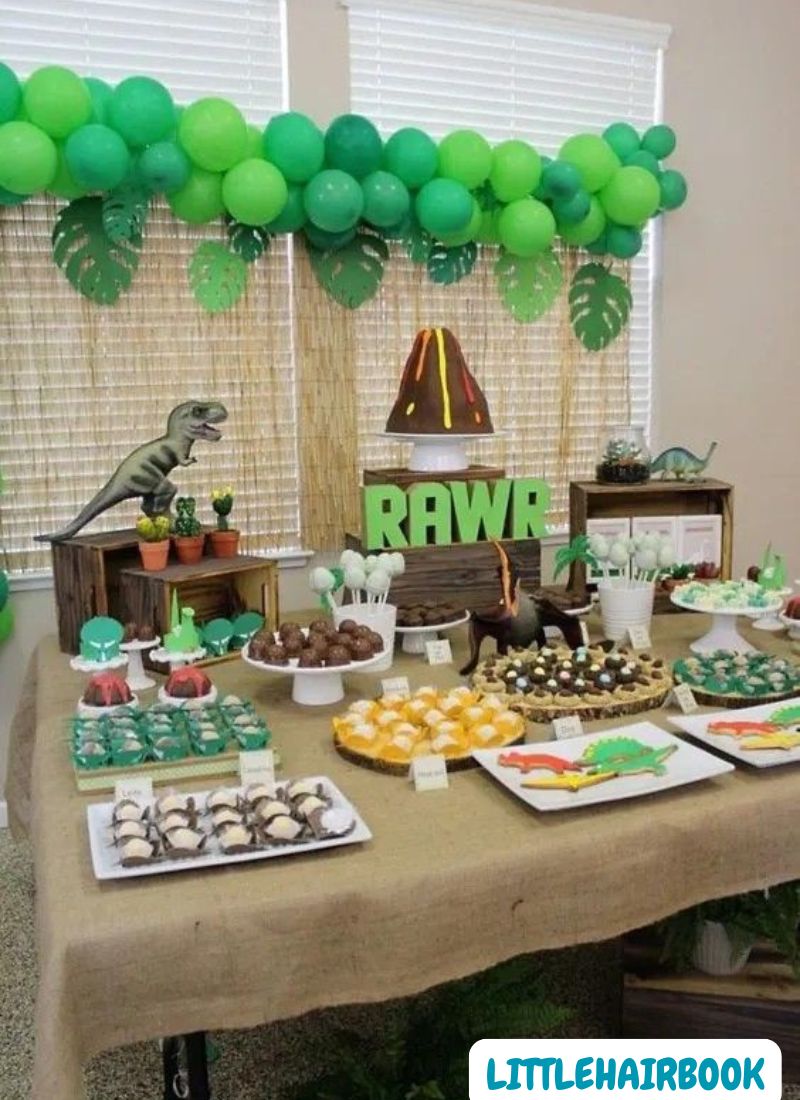
Planning a dinosaur birthday party can be so much fun, especially when your child loves everything about dinosaurs. But once you start looking at party decorations, the costs can quickly add up.
You might see huge dinosaur balloons, themed tableware, fancy backdrops, and custom party signs. They look amazing, but buying everything can put pressure on your budget.
Here is the good news. You can make beautiful dinosaur birthday party decorations at home without spending a fortune.
With cardboard boxes, colored paper, balloons, and a little creativity, you can transform an ordinary room into a prehistoric adventure. Your child can even help with some of the projects.
Imagine your little dinosaur fan walking into the party room. They see giant dinosaur footprints leading to the cake table. Green vines hang from the walls, and homemade dinosaur eggs sit beside a volcano centerpiece. Suddenly, the living room feels like a dinosaur world.
You do not need expensive supplies to create that moment.
The secret is choosing a few decorations that make a big difference. You can focus on the entrance, cake table, walls, and party area. Then use smaller details to bring everything together.
In this guide, you will learn how to make DIY dinosaur birthday party decorations using simple materials. You will also find ideas for different budgets, ages, and party spaces.
Let’s get started!
1. Choose Your Dinosaur Party Colors and Theme
Before making anything, decide what you want the party to look like. This makes shopping easier and helps you avoid buying supplies that do not match.
Dinosaur parties can look different depending on your child’s favorite dinosaurs and colors. Some children love fierce T Rex decorations. Others prefer cute cartoon dinosaurs with bright colors.
You can choose a jungle dinosaur theme, a dinosaur fossil theme, or a colorful cartoon theme. You can even create a Jurassic adventure with volcanoes, footprints, and prehistoric plants.
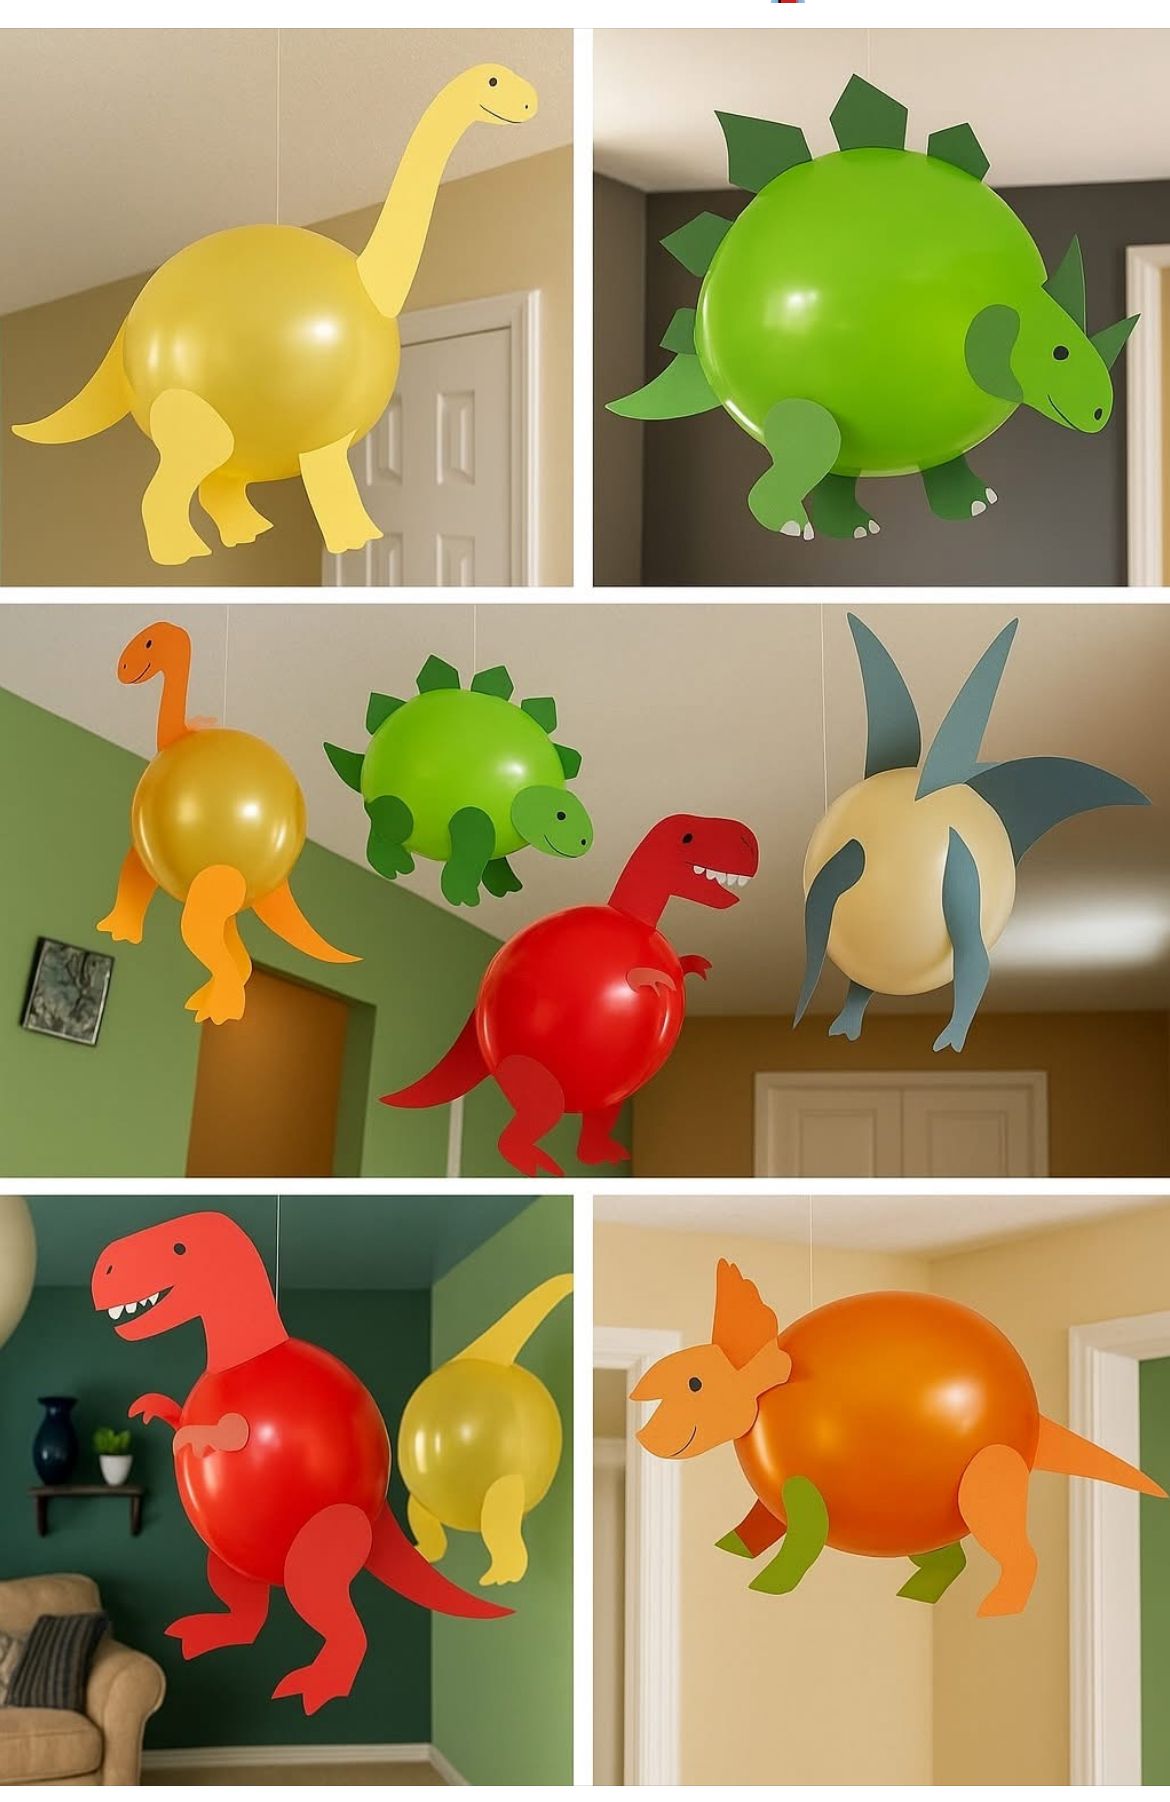
Pick Two or Three Main Colors
You do not need every color in the shop. Choose two or three shades and use them across your decorations.
Here are a few combinations you can try:
-
Jungle dinosaur party: Green, brown, and cream.
-
Volcano dinosaur party: Orange, red, and dark green.
-
Cute dinosaur party: Light green, yellow, and blue.
-
Fossil explorer party: Beige, brown, and dark green.
Green and brown are easy choices because they create a natural prehistoric look. You can also use orange to make the decorations brighter.
Once you choose your colors, use them for the balloons, banners, paper decorations, and table setup.
Decide Which Decorations Matter Most
You might want to decorate every corner, but that can take a lot of time. Instead, choose three main areas to decorate.
Start with the entrance, the cake table, and the main party wall. These areas will make the biggest difference in how the party looks.
For example, you could place dinosaur footprints near the entrance. Then decorate the cake table with paper trees and a homemade volcano. A dinosaur banner can finish the wall behind the cake.
You can keep the remaining areas simple. A few balloons and matching table covers will help everything look connected.
If you are planning a different character theme for another birthday, How to Plan a Bluey Themed Birthday Party on a Budget offers more ideas for choosing decorations without overspending.
2. Make Giant Dinosaur Footprints for the Entrance
Imagine your guests arriving and finding giant dinosaur footprints leading toward the party. It immediately makes the celebration feel like an adventure.
This decoration is easy to make, and you can use materials you already have at home.
What You Need
-
Green, brown, or gray cardboard
-
A pencil or marker
-
Scissors
-
Tape suitable for your floor
-
A dinosaur footprint template, if needed
How to Make the Footprints
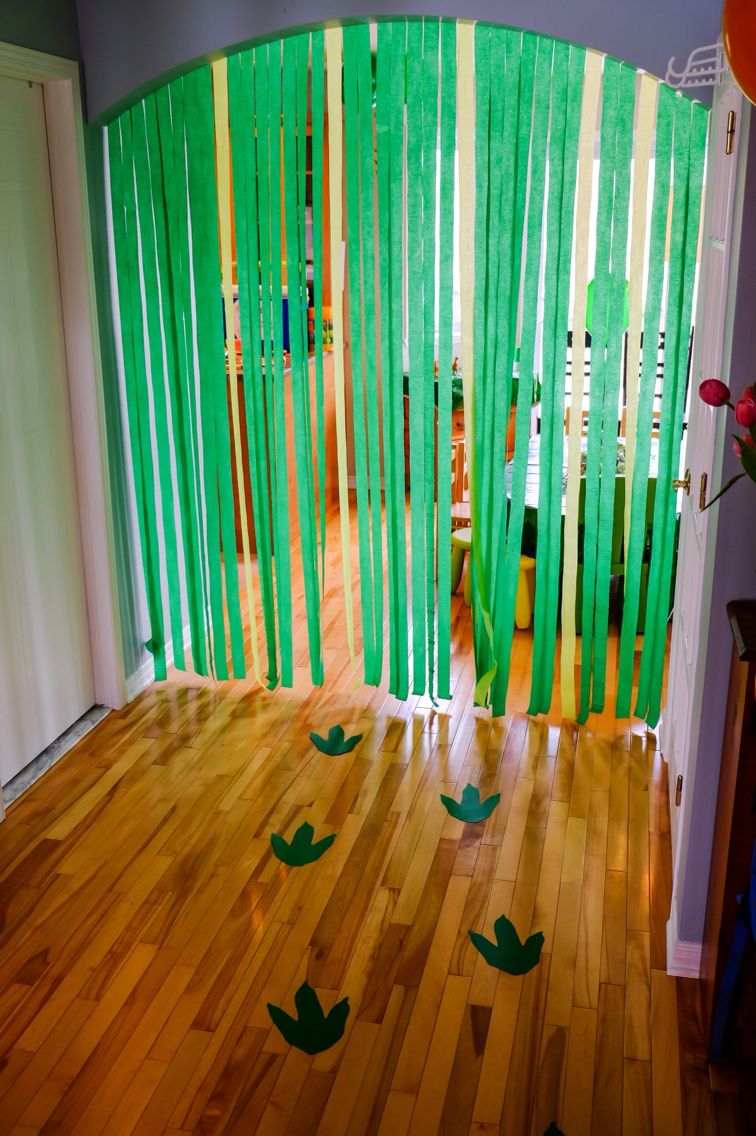
First, draw a large dinosaur foot shape on cardboard. You can make it look like a wide foot with three or four rounded toes.
Cut out the shape carefully. Use it as a template for the remaining footprints.
Make around eight to twelve footprints, depending on the length of your entrance. They do not need to look exactly alike.
You can use different shades of green and brown to make the trail more interesting. Add small paper claw marks if you want a more detailed look.
Next, place the footprints along the path guests will use. Let them lead toward the party room or cake table.
Use tape that will not damage your floor. Test it in a small area first, especially on delicate surfaces.
Make the Footprints Look More Realistic
You can add small details to make the footprints look like they belong to different dinosaurs.
Use a marker to draw lines across some footprints. Add small dots or scratch marks to others.
You could also place a few paper leaves beside the trail. This makes the entrance look like a path through a dinosaur jungle.
If you have children helping, let them color the footprints. They can even invent names for the dinosaurs that left them behind.
Turn the Footprints Into a Party Game
You can make the decorations part of the entertainment.
Ask the children to follow the footprints and find a hidden dinosaur picture at the end. You could also ask them to count the footprints as they walk.
This is especially helpful when guests arrive at different times. Children can explore while you finish preparing the food.
Keep the path clear so nobody trips. Avoid placing paper on stairs or slippery surfaces.
3. Create a DIY Dinosaur Birthday Banner
A birthday banner can bring the whole theme together. The best part is that you can make one with paper, cardboard, and string.
You do not need professional lettering or expensive printed decorations. A simple handmade banner can look lovely above the cake table.
What You Need
-
Colored cardstock or thin cardboard
-
Green, orange, and brown paper
-
String or ribbon
-
A pencil and marker
-
Scissors
-
How to Make Your Banner
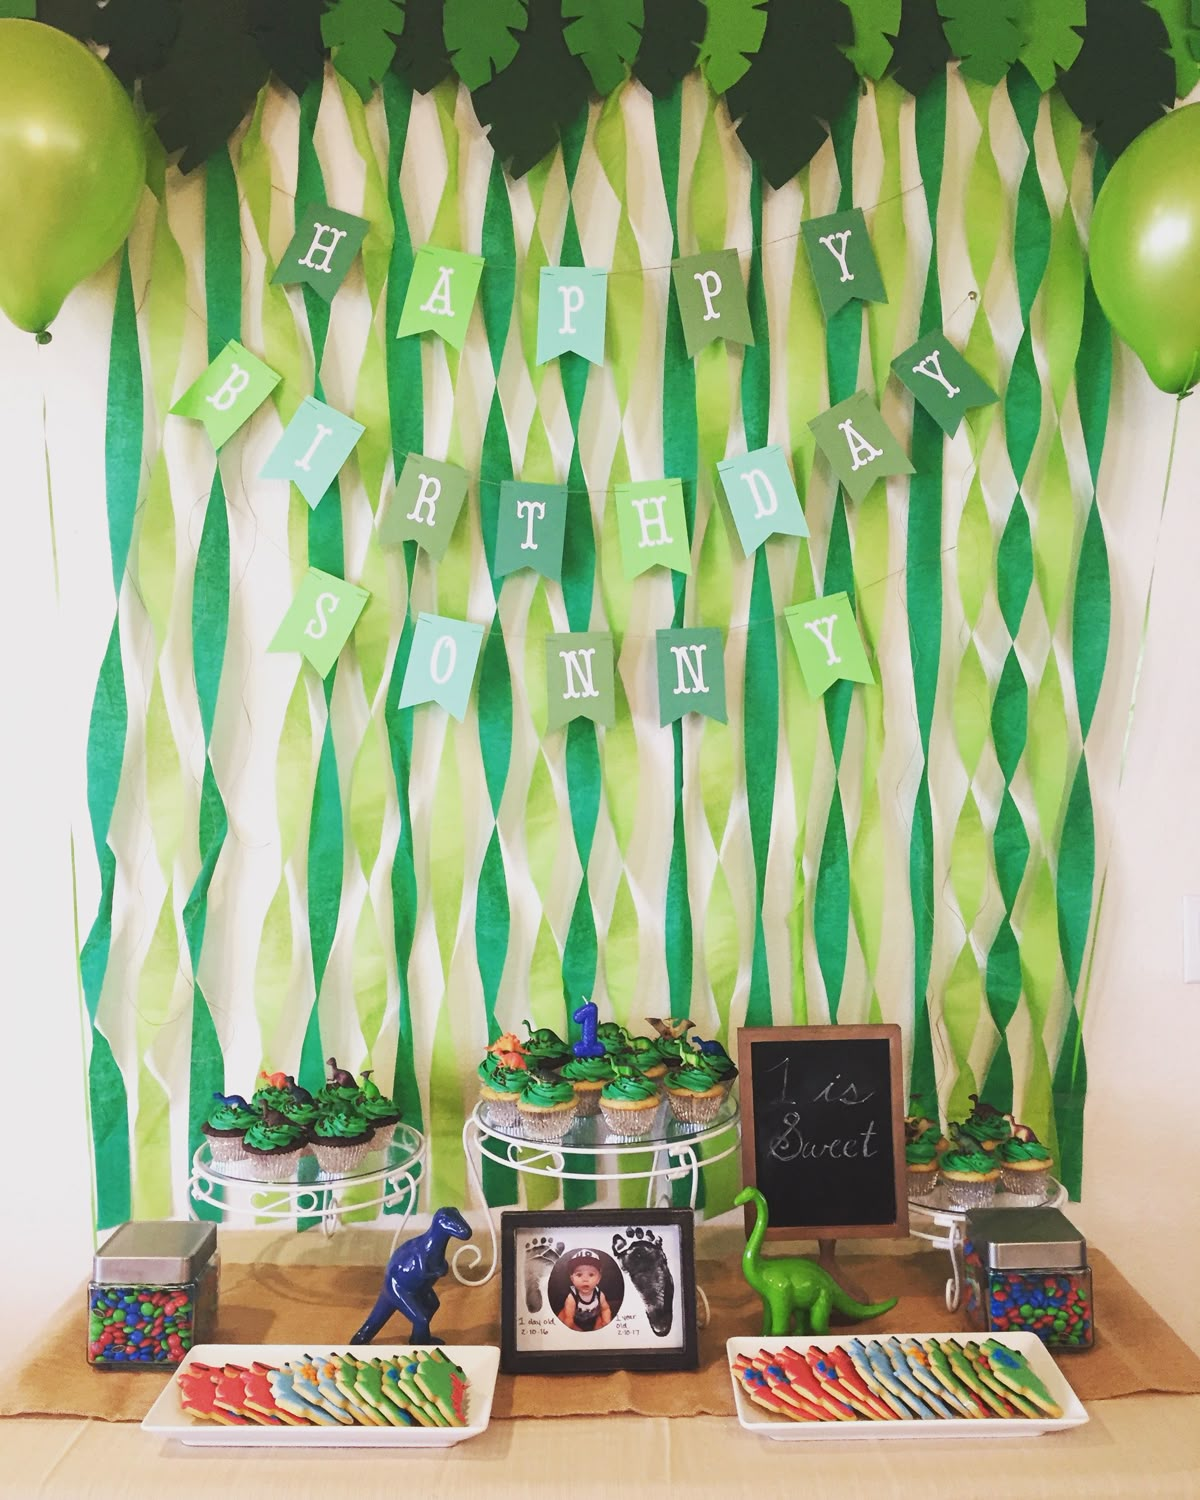
Start by cutting your cardstock into equal sized triangles or rectangles. These will hold the letters.
Write one large letter on each piece to spell out “HAPPY BIRTHDAY.” Use a thick marker so the words are easy to read from a distance.
You can make the letters orange, green, or brown. Another option is to use different colors for each letter.
Next, cut small dinosaur shapes from green paper. You can make simple T Rex silhouettes, long necks, or tiny dinosaur eggs.
Glue one dinosaur shape onto a few of the banner pieces. You do not need to decorate every single one.
Once the glue dries, attach the pieces to your string. Leave a little space between each piece so the banner hangs neatly.
Hang it above the cake table or against your main party wall.
Add Your Child’s Name
If you want something more personal, create a smaller banner with your child’s name.
Hang it beneath the main birthday banner. You can use the same colors to keep the display coordinated.
You could also write a playful message like “Roar, It’s My Birthday!” or “Welcome to the Dino Party!”
Choose words your child will enjoy seeing. This small detail can make the decoration feel special.
Make the Banner Last Longer
If you want to reuse the banner, consider using sturdy cardstock instead of thin paper.
Store it flat in a folder after the party. Keep it away from moisture so the letters stay in good condition.
You can also reuse the dinosaur shapes for future craft activities. This helps you get more value from the supplies you buy.
For another celebration filled with building and creative play, 25 Fun Minecraft Birthday Party Games for Kids has ideas that can inspire fun activities around a themed party.
4. Make a Dinosaur Volcano Centerpiece
A volcano centerpiece can make your dinosaur party look like a prehistoric adventure. It also gives you one main decoration for the cake or food table.
You can build a simple version using cardboard, paper, and glue. There is no need to buy a large display from a party shop.
What You Need
-
A small cardboard box or sturdy cardboard base
-
Brown paper or brown paint
-
Red and orange tissue paper
-
Glue or tape
-
Small toy dinosaurs
-
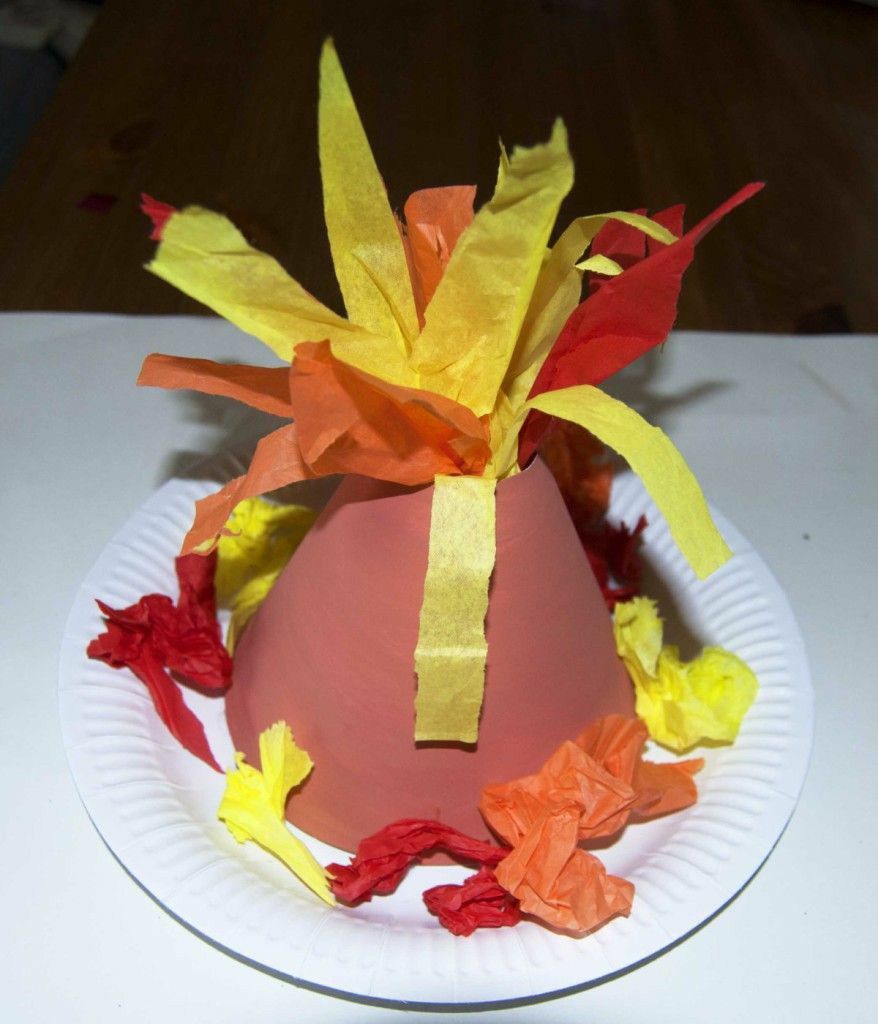
How to Make the Volcano
First, create a cone shape using cardboard. Roll the cardboard into a wide cone, leaving an opening at the top.
Secure the edges with tape. Then place the cone on a sturdy cardboard base so it can stand upright.
Cover the outside with brown paper. Crumple the paper slightly before attaching it to create a rough, rocky texture.
Next, cut strips of red and orange tissue paper. Arrange them around the top opening so they look like lava flowing down the volcano.
You can also add yellow paper for a brighter effect. Keep the tissue paper securely attached so it does not fall into the food.
Place a few toy dinosaurs around the base. Add green paper plants to make the scene look like a prehistoric landscape.
Give the Volcano More Detail
You can draw small rocks on the brown surface using a black marker. Add paper ferns or leaves around the bottom.
If your child has dinosaur toys, ask them to choose which ones belong in the display. This lets them help with the decorations.
Make sure the centerpiece is stable before placing it on the table. Keep it away from candles, hot food, and anything that could damage the paper.
Make It the Main Table Decoration
Place the volcano in the center of the cake table. Arrange smaller decorations around it without overcrowding the space.
You could put paper dinosaur eggs on one side and a small dinosaur figure on the other. Keep enough room for the cake, plates, and serving utensils.
If you are planning a second dinosaur activity for the party, How to Create a Dinosaur Egg Hunt for a Kids’ Party can help you turn the prehistoric theme into an interactive adventure.
5. Make DIY Dinosaur Eggs for Decoration
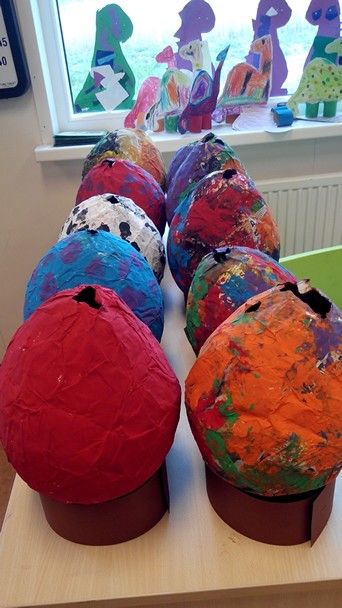
Dinosaur eggs are a fun way to make your party look like a prehistoric adventure. You can place them around the cake table, beside toy dinosaurs, or near the entrance.
The best part is that you do not need expensive supplies. You can use paper, balloons, flour, water, and leftover paint.
What You Need
-
Small balloons
-
Old newspapers or scrap paper
-
Flour and water
-
A bowl for mixing
-
Green, brown, beige, or white paint
-
Paintbrushes
-
Optional toy dinosaurs and artificial leaves
How to Make the Dinosaur Eggs
Step 1: Prepare the paper mixture.
Mix flour and water in a bowl until you get a smooth paste. Tear your old newspapers into small strips.
Step 2: Cover the balloons.
Blow up the balloons until they reach your preferred egg size. Dip each paper strip into the paste and cover the balloon.
Leave a small opening around the tied end. This helps you remove the balloon later.
Step 3: Add more layers.
Apply several layers of paper strips. Make sure each layer covers the previous one.
The eggs need enough layers to hold their shape. Let them dry completely before painting.
Step 4: Paint your dinosaur eggs.
Choose colors that match your party theme. Green, brown, beige, and cream work well for a jungle inspired look.
You can add spots, stripes, or small dots. These details make the eggs look more interesting.
Step 5: Finish and display them.
Once the eggs are dry, carefully pop the balloons and remove them through the opening. If the shells feel weak, add another layer before painting.
Arrange the eggs in small baskets or among artificial leaves. You can also place a toy dinosaur beside each basket.
For a Pokémon inspired celebration, you could use bright colors and playful displays. See How to Plan a Pokémon Themed Birthday Party for Kids for another themed party idea.
Another Easy Option: Paper Eggs
If you need decorations quickly, try making flat dinosaur eggs from cardboard.
Draw large oval shapes on cardboard and cut them out. Paint each oval, then add spots with a sponge or paintbrush.
You can lean the eggs against the wall or attach them to a party backdrop. This option works well when you want decorations without waiting for paper mache to dry.
6. Create a DIY Dinosaur Photo Booth
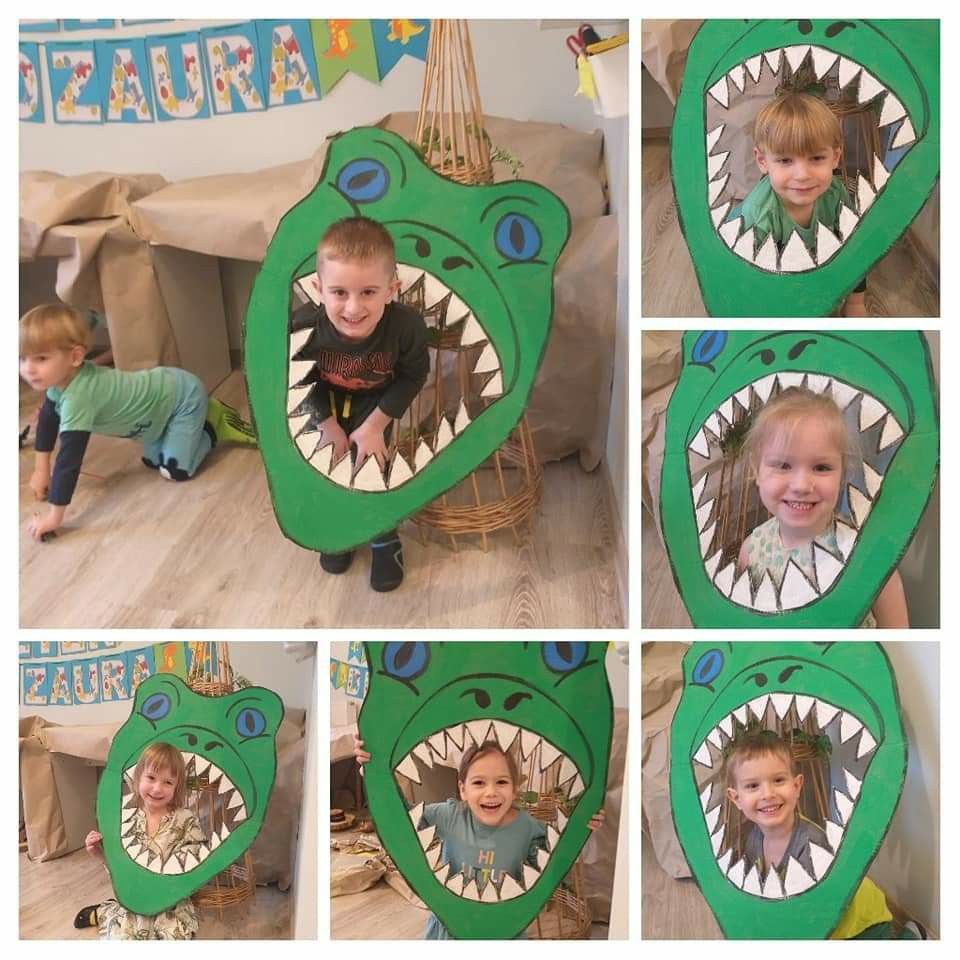
A photo booth gives children a place to take funny pictures with their friends. It also creates a special spot for family photos.
You do not need a professional backdrop. A decorated wall, homemade dinosaur props, and a few balloons can do the job.
What You Need
-
Large cardboard sheets
-
Green, brown, and orange paint
-
Scissors
-
Tape or removable wall hooks
-
Artificial leaves or paper plants
-
Balloons
-
Wooden sticks or paper straws for photo props
How to Make the Photo Booth
Step 1: Choose a suitable spot.
Find a clear wall with enough space for children to stand together. Choose a spot away from the food table and busy walkways.
Make sure the floor is flat and safe. You want children to move around without tripping over decorations.
Step 2: Create a dinosaur backdrop.
Cover the wall with green paper or a plain fabric sheet. Add paper vines, leaves, and dinosaur footprints.
You can also paint a simple jungle scene on a large cardboard sheet. Include trees, rocks, and a few friendly dinosaurs.
Step 3: Make oversized dinosaur props.
Draw dinosaur heads, tails, eggs, and footprints on cardboard. Cut them out and paint them in bright colors.
Attach the props to sturdy sticks. Adults should handle cutting and attaching sharp or pointed materials.
Step 4: Add a birthday sign.
Write a message such as “Roar! I’m Five!” or “Welcome to the Dinosaur Party.”
Use your child’s age or name to make the sign feel personal. Keep the lettering large enough to read in photos.
Step 5: Arrange the props.
Place the props in a basket beside the backdrop. Let children choose their favorite dinosaur face or sign.
You can take individual pictures and group photos throughout the party. If you have a phone tripod, set it up for hands free pictures.
Make It More Fun for Children
Invite guests to pretend they are dinosaurs. They can make funny faces, stretch their arms like tiny T Rexes, or pose beside the dinosaur eggs.
You could also prepare simple crowns or paper dinosaur tails. Keep the props light and comfortable for young children.
If your guests enjoy themed activities, 21 Easy Princess Birthday Party Activities for Young Kids offers another set of ideas for keeping children entertained.
7. Decorate With Dinosaur Balloons and Paper Plants
Balloons can make a birthday space feel festive without costing too much. You can use a few carefully placed clusters instead of covering the entire room.
Green, orange, brown, and cream balloons work well for a dinosaur theme. Add paper leaves to create a simple jungle look.
What You Need
-
Green, orange, brown, or cream balloons
-
Balloon tape or string
-
Green construction paper
-
Scissors
-
Tape
-
Cardboard dinosaur cutouts
-
Optional artificial leaves
How to Decorate With Balloons
Step 1: Choose your balloon colors.
Pick two or three colors that match your theme. Too many colors can make the setup look busy.
For a jungle party, try green, brown, and cream. For a playful dinosaur party, add orange or yellow.
Step 2: Create small balloon clusters.
Inflate balloons in different sizes. Tie them together in small groups using string or balloon tape.
Place one cluster near the entrance. Add another behind the cake table or beside the photo booth.
Step 3: Make paper jungle leaves.
Draw large leaves on green paper and cut them out. You can use different shades of green to create variety.
Fold each leaf down the middle to make it look more realistic. Attach the leaves around the balloon clusters with tape.
Step 4: Add dinosaur shapes.
Cut simple dinosaur silhouettes from cardboard. Paint them green or brown, then attach them near the balloons.
You can also place small toy dinosaurs on nearby tables. This helps connect the decorations and makes the whole room feel coordinated.
Keep the Decorations Budget Friendly
You do not need a large balloon arch to create a lovely display. Two balloon clusters can be enough for a small home party.
Use leftover paper from your banner to make extra leaves. You can also reuse decorations from previous birthday parties.
Keep balloons away from candles and hot surfaces. Always pick up broken balloon pieces quickly because they can be dangerous for young children.
For another home celebration with simple themed decorations, explore How to Create a Paw Patrol Inspired Birthday Party at Home.
8. Set Up a Dinosaur Party Table
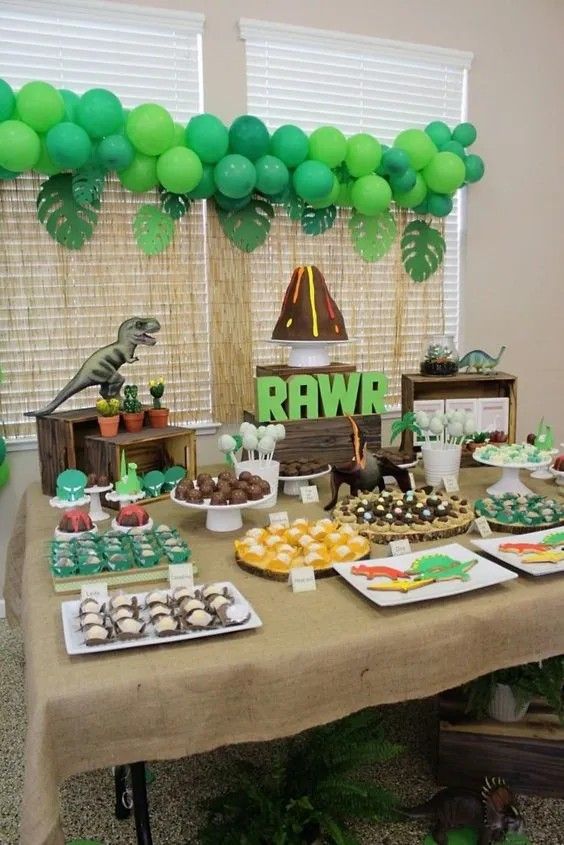
Your party table is one of the first things guests notice. It is also where many birthday pictures will be taken.
You can make it look special with a few homemade decorations. Start with the tablecloth, then add a centerpiece and small dinosaur details.
What You Need
-
A plain green, brown, or cream tablecloth
-
Brown craft paper
-
Toy dinosaurs
-
Paper leaves
-
Small baskets or containers
-
Homemade dinosaur eggs
-
Paper plates and cups
How to Decorate the Table
Step 1: Choose a simple tablecloth.
Use a plain tablecloth in one of your theme colors. If you do not have one, clean fabric can work too.
Brown craft paper can also cover the center of the table. It creates a natural look that fits the dinosaur theme.
Step 2: Add a dinosaur centerpiece.
Place your homemade volcano in the middle of the table. Surround it with toy dinosaurs and paper leaves.
Keep the centerpiece low enough for children to see across the table. Avoid heavy decorations that could fall onto the food.
Step 3: Make dinosaur place settings.
Use plain plates and cups to save money. Add a small dinosaur footprint to each place setting.
You can cut the footprints from colored paper. Attach one to each cup or place it beside each plate.
Step 4: Add small baskets of dinosaur eggs.
Place your paper eggs in small baskets. Arrange them at the ends of the table or beside the centerpiece.
If the eggs are sturdy, children can take one home after the party. For a younger group, make sure the decorations have no small parts that could become choking hazards.
Step 5: Create a simple food display.
Give snacks fun dinosaur names on small paper labels. For example, grapes could become “Dinosaur Eggs,” while crackers could be “Fossil Bites.”
Use labels only when they match the actual food. This keeps the display fun and helps guests identify what they are eating.
Keep the Table Comfortable for Children
Leave enough space for plates, cups, and little hands. Avoid placing too many decorations where children need to eat.
Put drinks near the edge only if they can sit securely. Keep the cake and any messy treats in a separate area if space allows.
You can create a different kind of magical party table with ideas from [How to Make a Winnie the Pooh Themed Birthday Party Feel Magical].
9. Make Dinosaur Party Signs and Labels
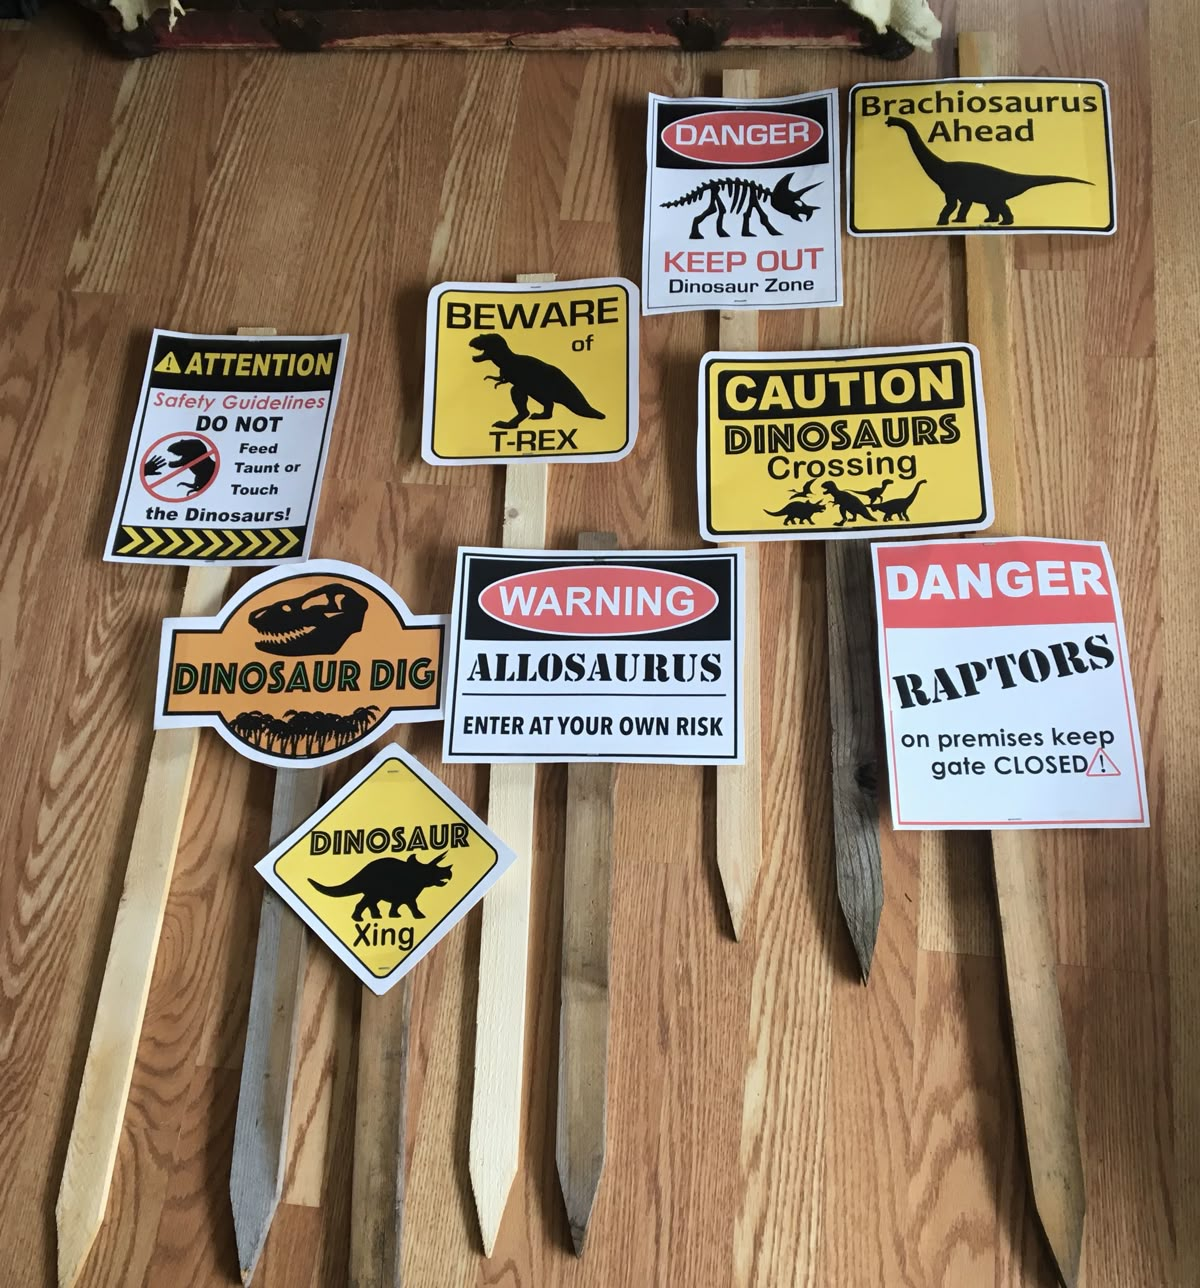
Party signs help guests find important areas while adding more dinosaur details to your decorations. They are easy to make from cardboard and leftover craft supplies.
You can create a welcome sign, food labels, and signs for party activities. Keep the words short so young children can understand them.
What You Need
-
Cardboard or thick paper
-
Markers or paint
-
Scissors
-
Craft sticks
-
Tape
-
Green and brown paper
-
Optional toy dinosaurs
Sign Ideas to Make at Home
Step 1: Make a welcome sign.
Cut a large rectangle or dinosaur footprint shape from cardboard. Write “Welcome to the Dinosaur Party!” in large letters.
Add your child’s name and age. Decorate the edges with paper leaves or small dinosaur drawings.
Place the sign near the entrance. Make sure it does not block the doorway or create a tripping hazard.
Step 2: Create food labels.
Cut small rectangles from thick paper. Write a fun name for each snack or drink.
Try “Dino Fruit,” “Fossil Crackers,” or “Dinosaur Watering Hole.” Place each label beside the matching food.
Step 3: Label the activity areas.
If you have several party activities, create signs for each one. For example, you could label the photo booth “Dino Picture Spot.”
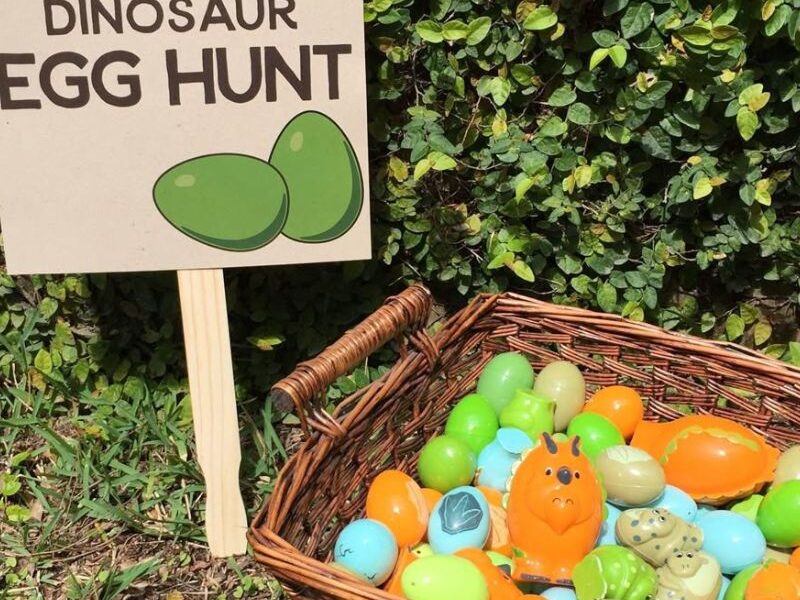
You could also make a “Dinosaur Egg Hunt” sign. Place it near the area where children will search for the eggs.
Step 4: Decorate the signs.
Draw dinosaur footprints around the edges. Add small leaves, eggs, or friendly dinosaur faces.
Use colors that match the rest of the party. This helps the signs look like part of one decoration set.
Make Your Signs Useful After the Party
Keep the signs simple enough to reuse. You can turn the cardboard into craft supplies for another children’s activity.
You could even let children decorate a few blank signs during the party. Give them washable markers and supervise the activity.
For more ideas to keep the celebration moving, see 17 Easy Birthday Party Games for Kids at Home.
10. Add Small Dinosaur Details and Finish the Setup
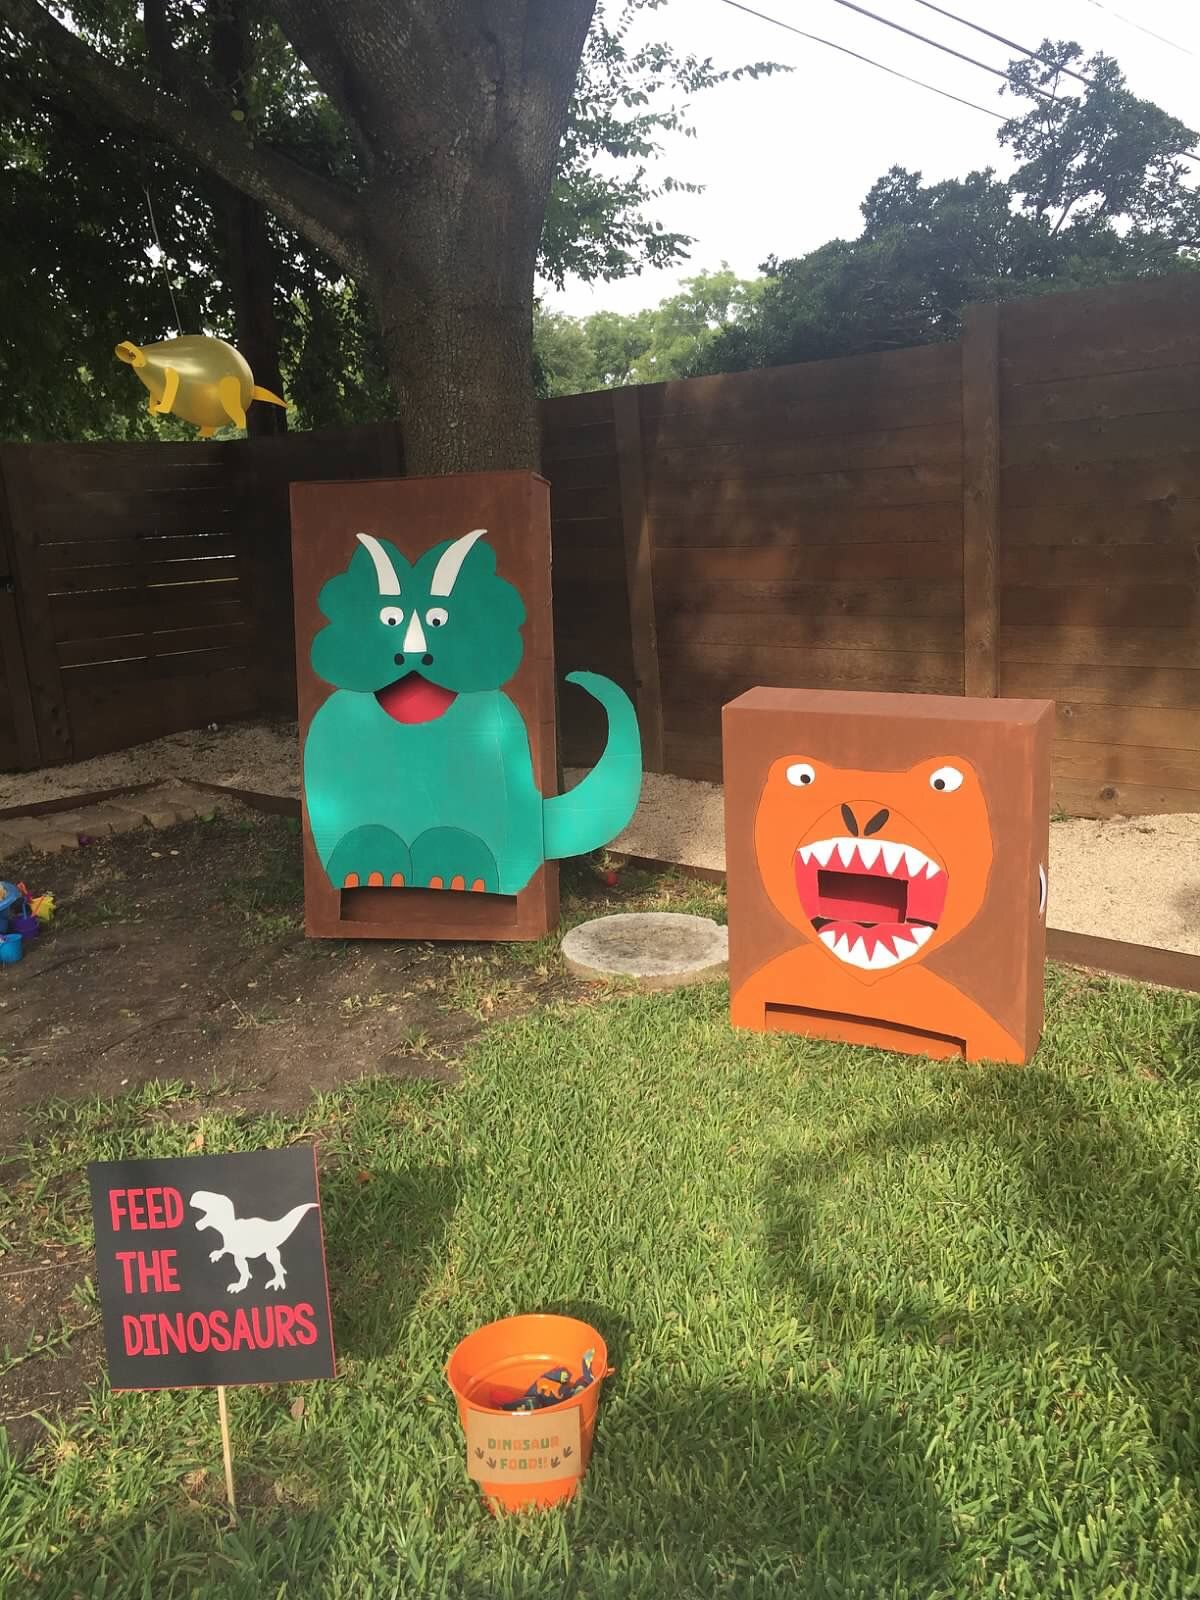
You have the main decorations ready. Now it is time to bring everything together with a few small details.
These finishing touches help your party feel planned without requiring more expensive supplies. Focus on areas guests will notice most.
Add Dinosaur Footprints Along the Floor
Use paper footprints to guide guests toward the party area. You can place them along a hallway or near the entrance.
Secure them with suitable tape so they do not slide. Avoid placing them on stairs or slippery surfaces.
Make a Simple Dinosaur Gift Table
If you are giving children small party favors, decorate one table or basket for them. Use paper leaves, toy dinosaurs, or a small handmade sign.
You could include dinosaur stickers, coloring sheets, or small craft packs. Choose items that suit the children’s ages and avoid tiny pieces for toddlers.
Create a Dinosaur Craft Corner
Set aside a small area where children can decorate paper dinosaur masks or color dinosaur pictures. Put the supplies in easy to reach containers.
Cover the table with scrap paper for easier cleanup. Have an adult supervise scissors, glue, and other craft materials.
Check the Decorations Before Guests Arrive
Walk around the party space and check each area. Make sure decorations are secure and walkways remain clear.
Keep candles, hot food, and electrical cords away from paper decorations. Remove any broken balloons and loose small parts.
If you have a large backdrop, check that it cannot tip over. Make sure children can play safely around the decorations.
Bring the Whole Theme Together
Your decorations do not need to match perfectly. Repeating a few colors and dinosaur shapes will make the room feel connected.
Use the banner above the cake table, footprints near the entrance, and the volcano as your centerpiece. Put the photo booth in a separate corner if you have enough space.
For another character themed celebration with homemade decoration ideas, visit How to Plan a Sonic Themed Birthday Party With DIY Decorations.
Amazing content