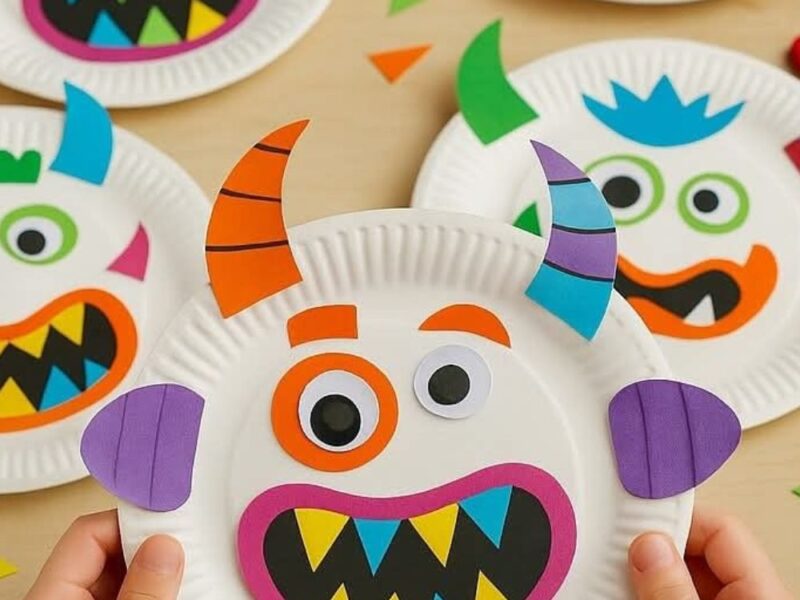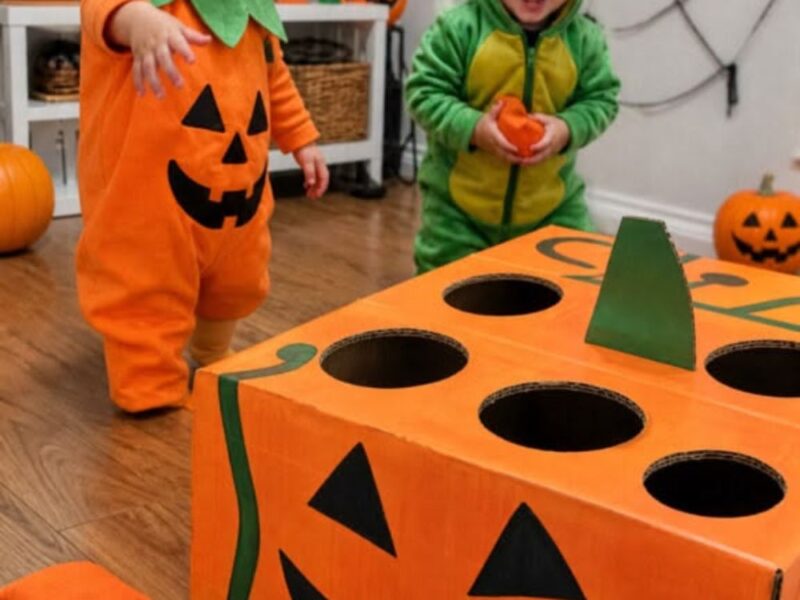

Paper plates are one of those things that make kids’ crafts so much easier. You probably already have some at home, and with a little orange paint, one can quickly turn into a cute Halloween pumpkin.
Give each child a paper plate and let them paint the whole thing orange. They do not need to make it perfect. In fact, letting them leave a few brush marks can make the pumpkin look even more fun.
While the paint is drying, cut out two eyes, a nose, and a mouth from black paper. Older kids can draw and cut out their own shapes, while younger kids may need a little help.
Once the plate is dry, glue the face pieces onto it. Add a small piece of green paper at the top for the stem. You can also use a black marker to draw a few curved lines from the top to the bottom of the plate.
Want to make the pumpkins a little different? Let the kids create their own faces. One can have a big smile, another can look surprised, and another can have funny teeth.
This is also a nice craft to put on the wall, fridge, or bedroom door when you are finished.
What you need:
• Paper plates
• Orange paint
• Black paper
• Green paper
• Glue
• Scissors
• Paintbrushes
• Black marker
2. Toilet Paper Roll Bat

That empty toilet paper roll sitting in the bathroom bin can become something much more fun. With a little black paint and some paper wings, you can turn it into a tiny Halloween bat.
Start by painting the toilet paper roll black. Let the kids cover as much of it as they can. If you want to skip the paint and make things less messy, wrap the roll in black paper instead.
While the roll is drying, cut out two bat wings from black paper. You can draw the shape first so the kids can follow the lines when cutting.
Next, fold the top edges of the toilet paper roll inward to create two little ears. Glue on the wings, then add two googly eyes or make eyes from white paper.
Finish the face with a tiny black mouth. You could even give the bat two little white teeth.
Make a few bats together and hang them around the room. They look especially cute when several are hanging at different heights.
And if you want more ideas for keeping the kids busy inside, these Indoor Halloween Activities for Kids are worth checking out too.
What you need:
• Empty toilet paper rolls
• Black paint or black paper
• Black paper for the wings
• Googly eyes or white paper
• Glue
• Scissors
• Black marker
• Paintbrush
3. Handprint Ghost
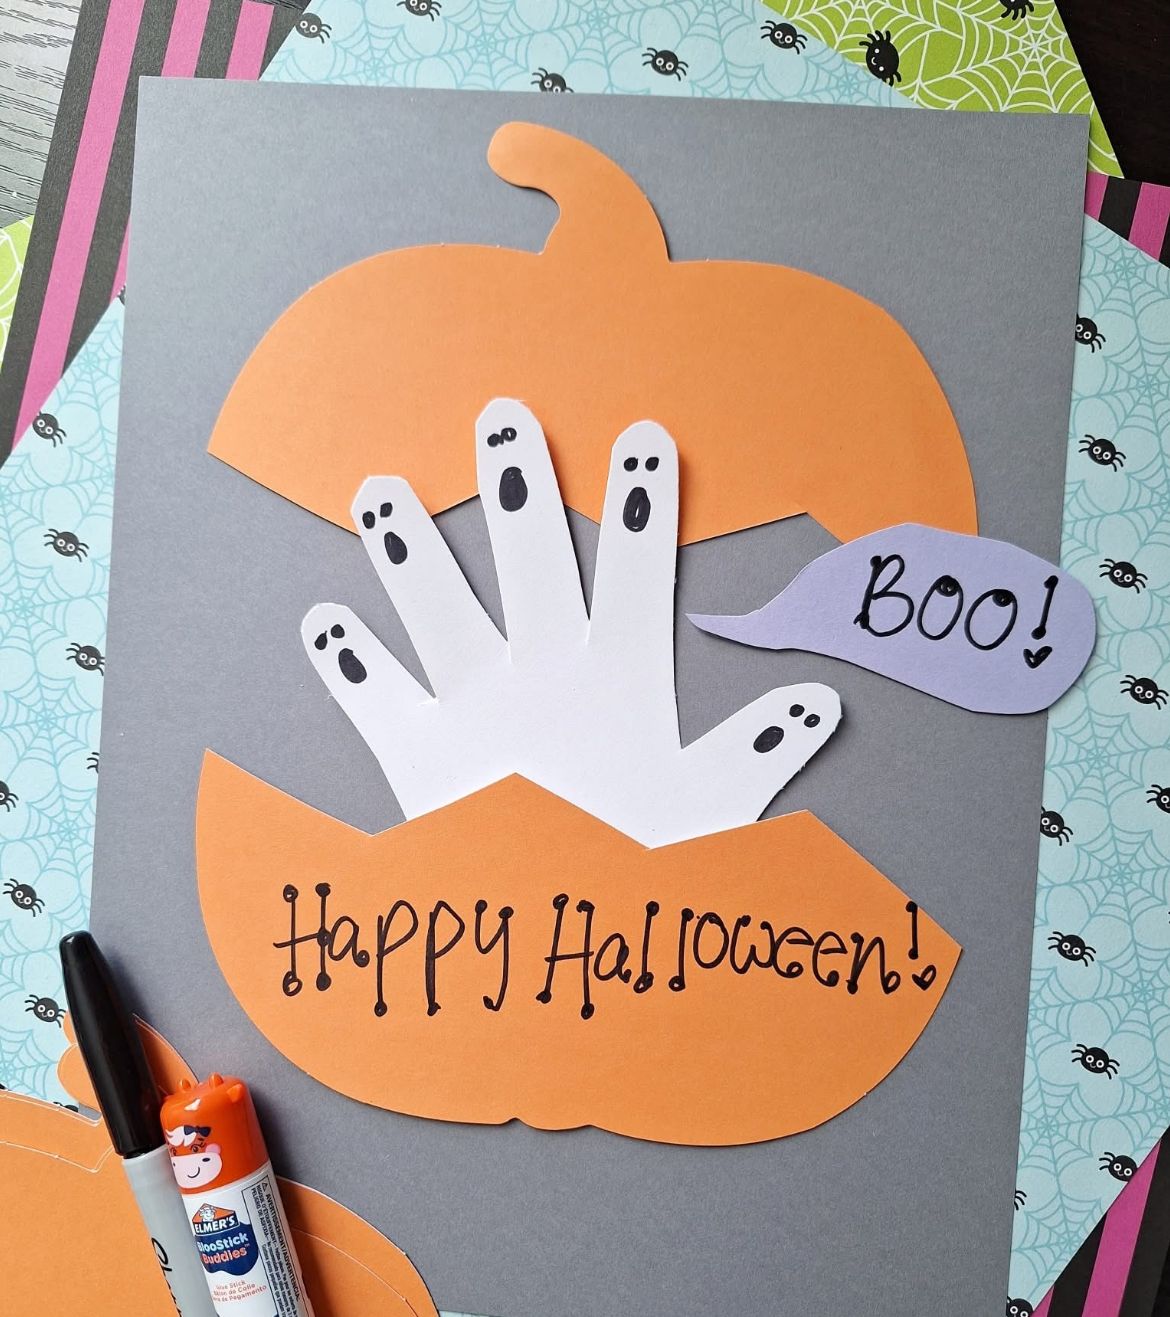
There is something really cute about turning a child’s handprint into a Halloween craft. This little ghost is simple enough for young kids and gives you something you may want to keep after Halloween is over.
Start by placing a piece of white paper on the table. Paint the child’s palm and fingers with white washable paint, then help them press their hand firmly onto the paper.
Lift the hand straight up and let the print dry.
Once the paint is dry, turn the paper upside down so the fingers become the bottom of the ghost. Add two black eyes and a small mouth using a marker.
For a little extra fun, let the kids decorate the background. They can add a moon, stars, bats, pumpkins, or anything else they like.
If you are doing this craft with toddlers, keep the design simple and let them enjoy the messy part. You can handle the smaller details afterward. You can also find more age friendly ideas in these Halloween Activities for Toddlers.
What you need:
• White paper
• White washable paint
• Black marker
• Paintbrush
• Optional crayons or colored pencils
4. Paper Bag Pumpkin
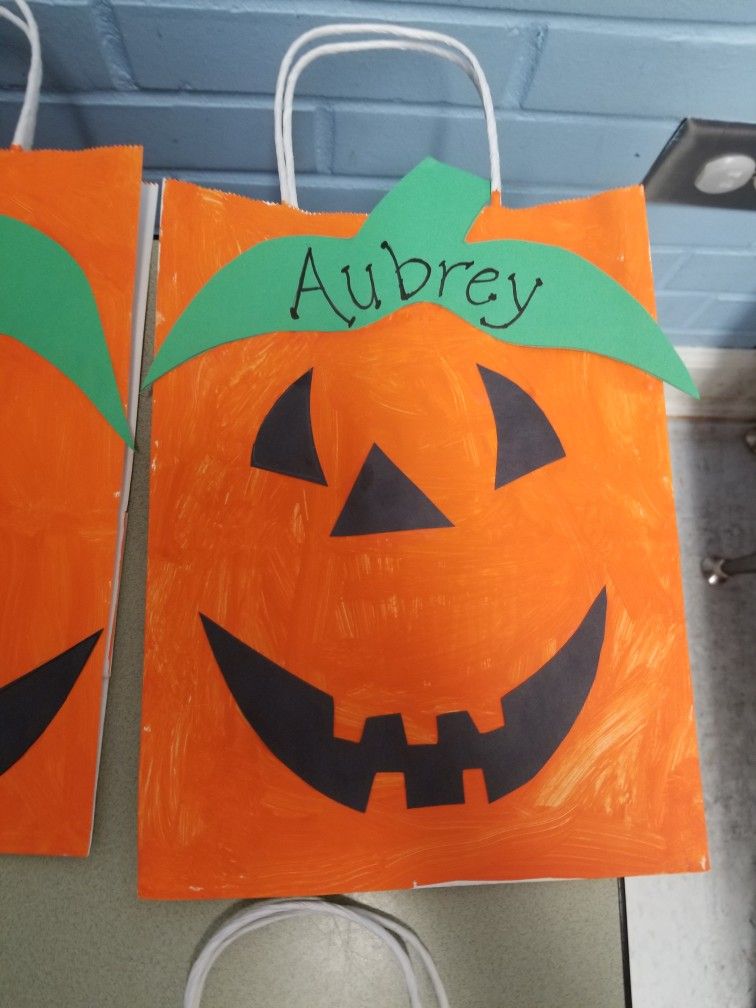
Paper bags can become all kinds of fun Halloween decorations, and this pumpkin is one of the easiest ones to make.
Take a small brown paper bag and let the kids paint the outside orange. You can use a paintbrush or let them dab the paint on with a sponge.
Once the bag is dry, draw a pumpkin face on the front. Kids who are old enough can draw their own face. There is no need to make it look perfect.
Fill the bag with crumpled newspaper or scrap paper. This gives the pumpkin some shape and makes it stand up nicely.
Twist the top of the bag and tie it with a piece of green string or ribbon. You can also wrap green paper around the top to make a simple stem.
Want to make a whole pumpkin family? Make several bags and give each one a different face. You could have a happy pumpkin, a sleepy pumpkin, a silly pumpkin, and one with a huge smile.
This craft works well at home, but it can also be a fun project for a classroom.
What you need:
• Small brown paper bags
• Orange paint
• Black marker
• Newspaper or scrap paper
• Green paper, string, or ribbon
• Glue
• Paintbrush
5. Halloween Spider Craft

If your kids like creepy crawly things, this little spider will probably be a hit. The funny thing is that it looks much harder to make than it really is.
Start with a small paper plate and paint it black. Let it dry completely before moving on to the next step.
For the legs, cut eight strips of black paper. Fold each strip a few times to give the legs a little shape. Glue four legs to each side of the plate.
Now add two big googly eyes. If you do not have googly eyes, white paper works just as well. Draw black dots in the middle for the pupils.
You can stop there, or give your spider a silly expression by adding a small mouth.
For younger kids, you can prepare the legs before starting and let them focus on painting, gluing, and decorating. That makes the craft much easier and keeps things moving.
You can also make several spiders and hang them from pieces of string around the house.
What you need:
• Paper plates
• Black paint
• Black paper
• Googly eyes or white paper
• Glue
• Scissors
• Black marker
• String
6. Popsicle Stick Witch

This little witch is a fun way to use up popsicle sticks from old craft projects. You only need a few supplies, and kids can have fun giving their witch a silly face.
Place several popsicle sticks side by side and glue them together. You can put one stick across the back to hold everything in place.
Paint the sticks purple, green, orange, or black. Let the kids choose the color they want for the witch’s face.
Once the paint dries, add two eyes and draw a nose and mouth. Then cut a small witch hat from black paper and glue it to the top.
You can add orange paper for hair, or use bits of yarn instead. A few strands of orange yarn can make the witch look really cute.
The best part is that every child can give their witch a different personality. Some might make a friendly witch, while others may give theirs a very funny face.
What you need:
• Popsicle sticks
• Paint
• Paintbrush
• Black paper
• Orange paper or yarn
• Googly eyes
• Glue
• Scissors
• Marker
7. Halloween Monster Paper Cup
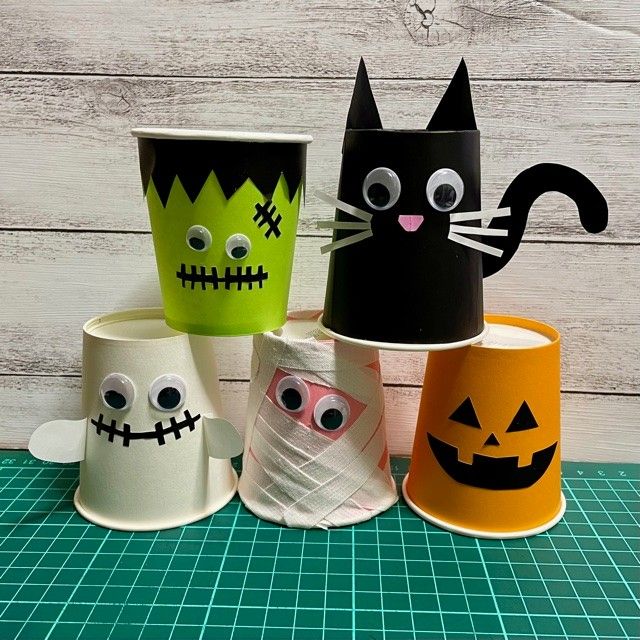
This one is perfect for kids who love making silly faces. A simple paper cup can become a funny Halloween monster in just a few steps.
Turn the cup upside down and paint it in any color you like. Green, purple, orange, and black all work well, but there is no rule here.
Once the paint dries, glue on some googly eyes. Give your monster as many eyes as you want. Three eyes can look just as fun as two.
Cut out a mouth from black paper and glue it underneath the eyes. Then add paper teeth, horns, ears, or even a long tongue.
You can let the kids use scraps of paper to create their own monster features. This is where things can get really funny because they may come up with combinations you would never think of.
For younger children, this can be a great open ended craft because there is no right way to make the monster look.
What you need:
• Paper cups
• Paint
• Paintbrushes
• Googly eyes
• Colored paper
• Glue
• Scissors
• Marker
8. Cotton Ball Ghost
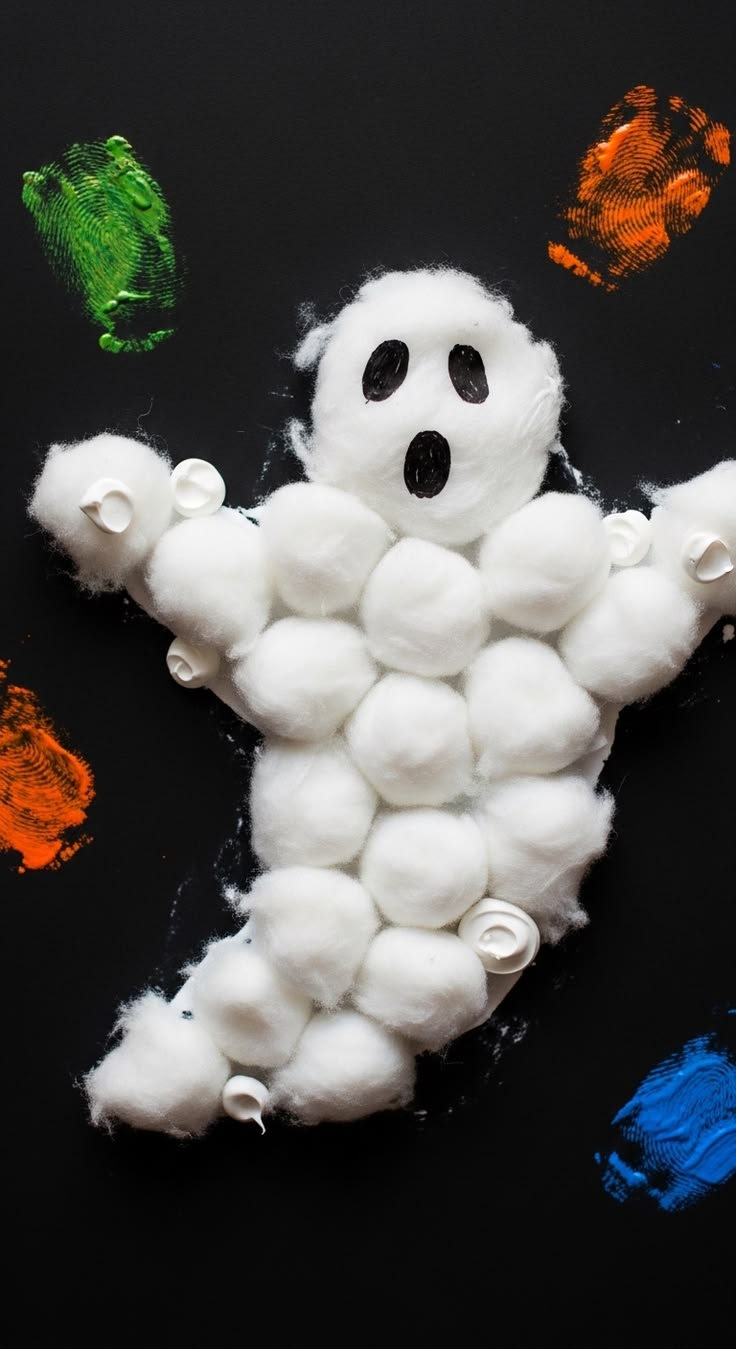
This cotton ball ghost is soft, simple, and great for little hands. You only need a few basic supplies, so it is a good choice for a quick Halloween craft.
Draw a simple ghost shape on a piece of white paper. You can make it as big or small as you like.
Give the kids cotton balls and let them cover the inside of the ghost with them. They can spread a little glue over the shape and press the cotton balls down one at a time.
Once the whole ghost is covered, add two black eyes and a small mouth.
For younger kids, you can draw the ghost beforehand so they only need to work on the gluing and decorating.
This is also a nice craft for preschool aged kids because the steps are easy to understand. If you are planning several activities for that age group, you can find more ideas in these Halloween Activities for Preschoolers.
What you need:
• White paper
• Cotton balls
• Glue
• Black paper or marker
• Scissors
• Pencil
9. Egg Carton Bats
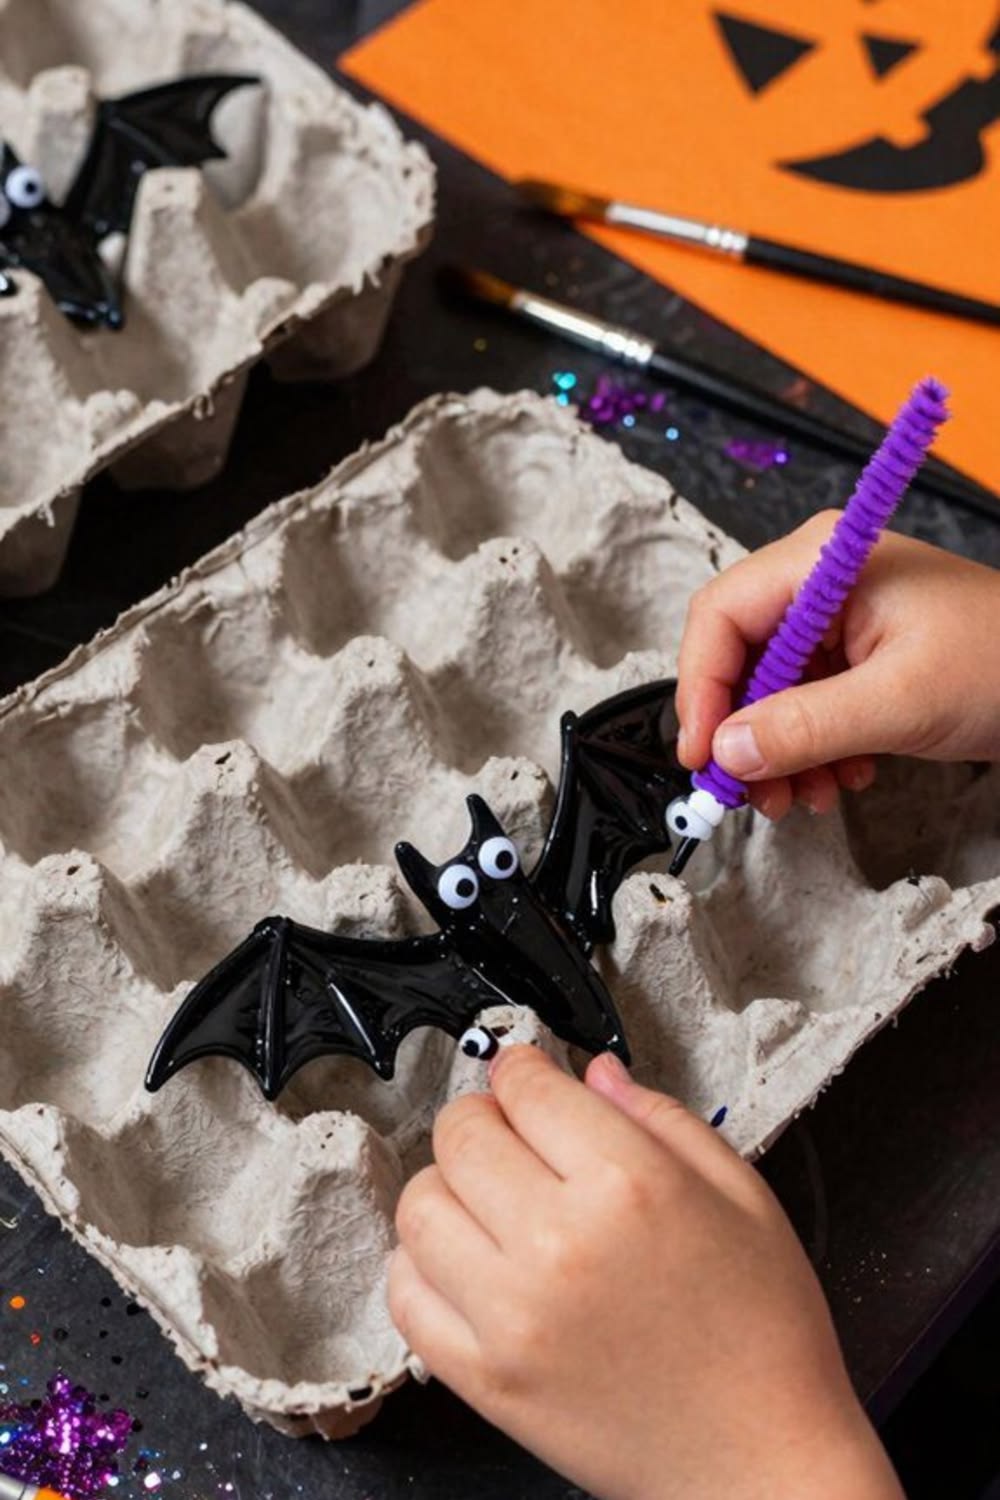
Before tossing that empty egg carton into the recycling bin, you can turn a few of its sections into tiny Halloween bats.
Cut three connected sections from the egg carton. An adult should handle this part because the carton can be tricky to cut.
Once you have the pieces ready, paint them black and let them dry.
Now turn the middle section into the bat’s body. The two sections beside it can become the wings. You can trim the outer edges into little points to make the wings look more like a bat’s wings.
Add two small eyes and a tiny mouth. You can use googly eyes, white paper, or simply draw them with a marker.
Make several bats and hang them from string. They can also be placed around a Halloween display or stuck to a wall with removable tape.
This is a good craft for older kids who enjoy doing a few more steps on their own. Younger kids can help with painting and decorating while an adult handles the cutting.
What you need:
• Empty egg carton
• Black paint
• Paintbrush
• Googly eyes or white paper
• Glue
• Scissors
• Black marker
• String
10. Halloween Pumpkin Sun Catcher
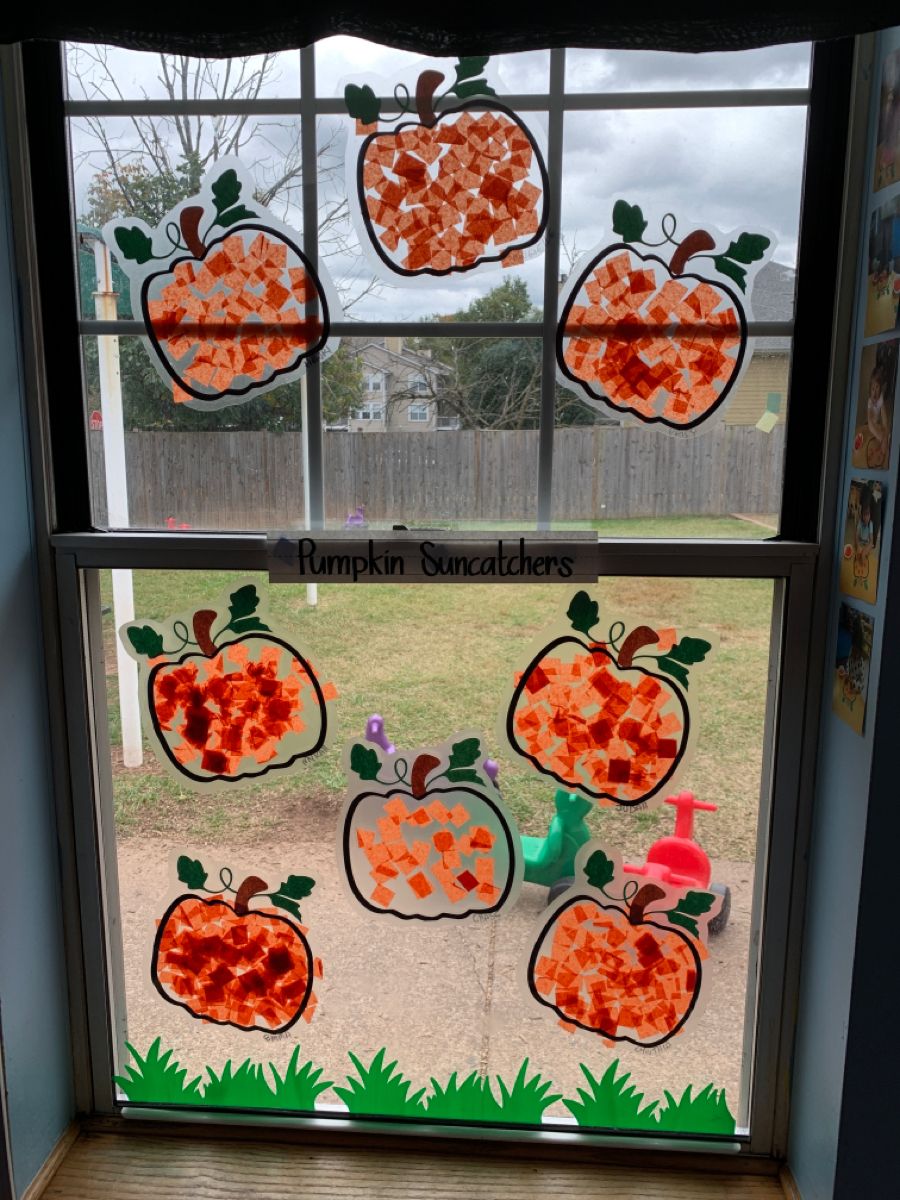
Bring a little Halloween color to the windows with this easy pumpkin sun catcher. Once the light comes through, the finished craft looks really pretty.
Start by drawing a large pumpkin outline on a piece of clear contact paper. Cut another piece of contact paper that is about the same size.
Place the first piece sticky side up on the table and give the kids small pieces of orange tissue paper. They can place the pieces inside the pumpkin shape until it is filled.
Add a few pieces of green tissue paper at the top for the stem.
When they are finished, carefully place the second piece of contact paper over the top. Press it down gently so everything stays in place.
Trim around the pumpkin and hang it on a window.
For younger kids, cut everything ahead of time and let them focus on choosing and placing the tissue paper. If you are short on time, this can also fit nicely into a list of Last Minute Halloween Activities for Kids.
11. Paper Bag Ghost
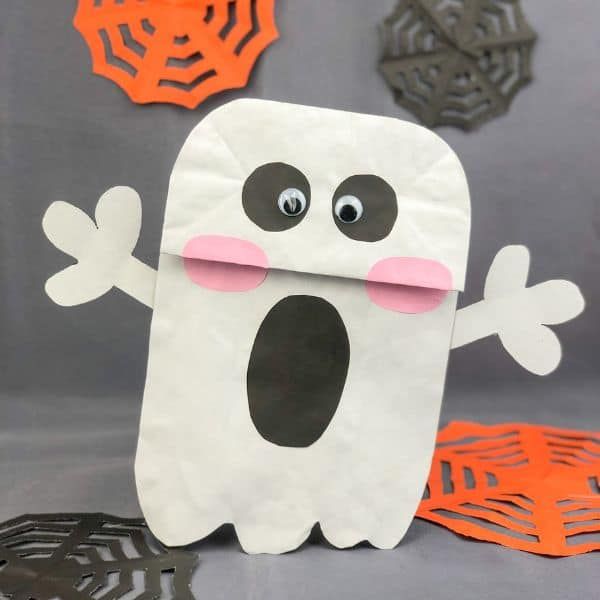
You can turn a simple paper bag into a friendly little ghost with just a few supplies. This one is especially nice if you want a craft that does not take much time.
Start by taking a small white paper bag. If the bag is brown, let the kids paint it white and give it some time to dry.
Once it is ready, draw two eyes and a mouth on the front. You can use a black marker, or cut the shapes from black paper and glue them on.
Now comes the fun part. Let the kids decorate their ghosts however they like. They can add a bow, a funny hat, rosy cheeks, or even some paper hair.
You can also stuff the bag with crumpled paper so the ghost stands up and looks fuller.
If you have more than one child making this craft, let each child create a different ghost. You might end up with a whole little ghost family by the end.
What you need:
• White paper bags
• Black marker or black paper
• Glue
• Scissors
• Crumpled paper
• Optional colored paper for decorations
12. Popsicle Stick Pumpkin

Popsicle sticks are great for simple Halloween crafts because kids can paint and decorate them without needing many complicated steps.
Lay several popsicle sticks next to each other to make the pumpkin. Glue one or two sticks across the back to hold them together.
Paint the front orange and let it dry.
Once the paint has dried, draw a pumpkin face using a black marker. You can make the face happy, silly, surprised, or a little spooky.
Add a small piece of green paper at the top for the stem. You can also glue a little piece of brown paper underneath the stem.
If your kids enjoy decorating, give them small pieces of ribbon, paper, or stickers to add around the pumpkin.
These little pumpkins can be displayed on a shelf, stuck to the fridge, or turned into hanging decorations by adding a piece of string to the back.
What you need:
• Popsicle sticks
• Orange paint
• Black marker
• Green paper
• Glue
• Scissors
• Paintbrush
• Optional stickers or ribbon
13. Halloween Handprint Spider
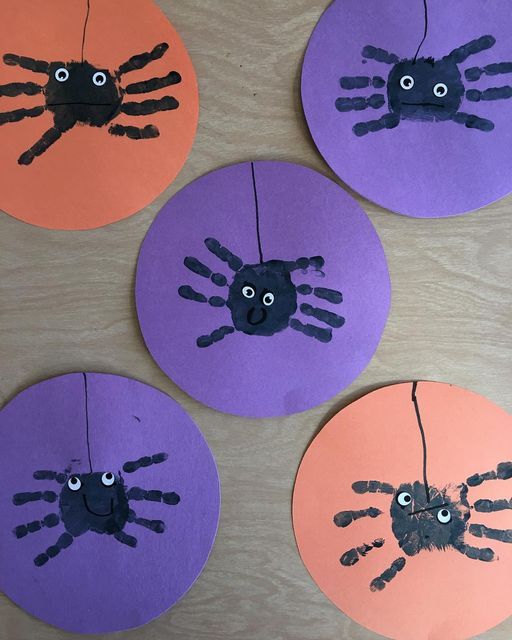
Kids love seeing their hands turn into something else, so this spider craft can be a lot of fun.
You will need two handprints to make the spider. Paint one hand with black washable paint, leaving out the thumb. Press it onto a sheet of paper, then do the same with the other hand beside it.
Once the paint dries, the fingers become the spider’s legs.
Add two googly eyes to the middle where the palms meet. You can also draw a little mouth if you want your spider to have a funny face.
For a more colorful picture, let the kids decorate the space around their spider. They can draw a web, pumpkins, leaves, or little Halloween stars.
This craft can get a little messy, but that is part of the fun. Keep some wipes or a damp cloth nearby and let the kids enjoy making their prints.
If you are planning Halloween activities for younger children, this is another easy one to add to the list.
What you need:
• White paper
• Black washable paint
• Googly eyes
• Paintbrush
• Black marker
• Optional crayons or colored pencils
14. Halloween Monster Bookmark

If your child loves books, turn Halloween craft time into something they can actually use afterward.
Start with a piece of colored paper or cardstock. Cut it into a long rectangle that is large enough to fit inside a book.
Now let the kids turn it into a monster.
They can glue on one big eye, three small eyes, or as many as they want. Add a mouth with funny teeth, two little horns, and maybe some wild paper hair.
You can use different colors for each monster. Purple, green, orange, and black can all work well.
Once everything is glued down and dry, the bookmark is ready to use.
The best thing about this craft is that it does not need to look perfect. In fact, the stranger the monster looks, the more fun it becomes.
You could even have the kids make a few bookmarks and give them to their friends.
What you need:
• Colored paper or cardstock
• Colored paper scraps
• Googly eyes
• Glue
• Scissors
• Markers
15. Halloween Paper Chain
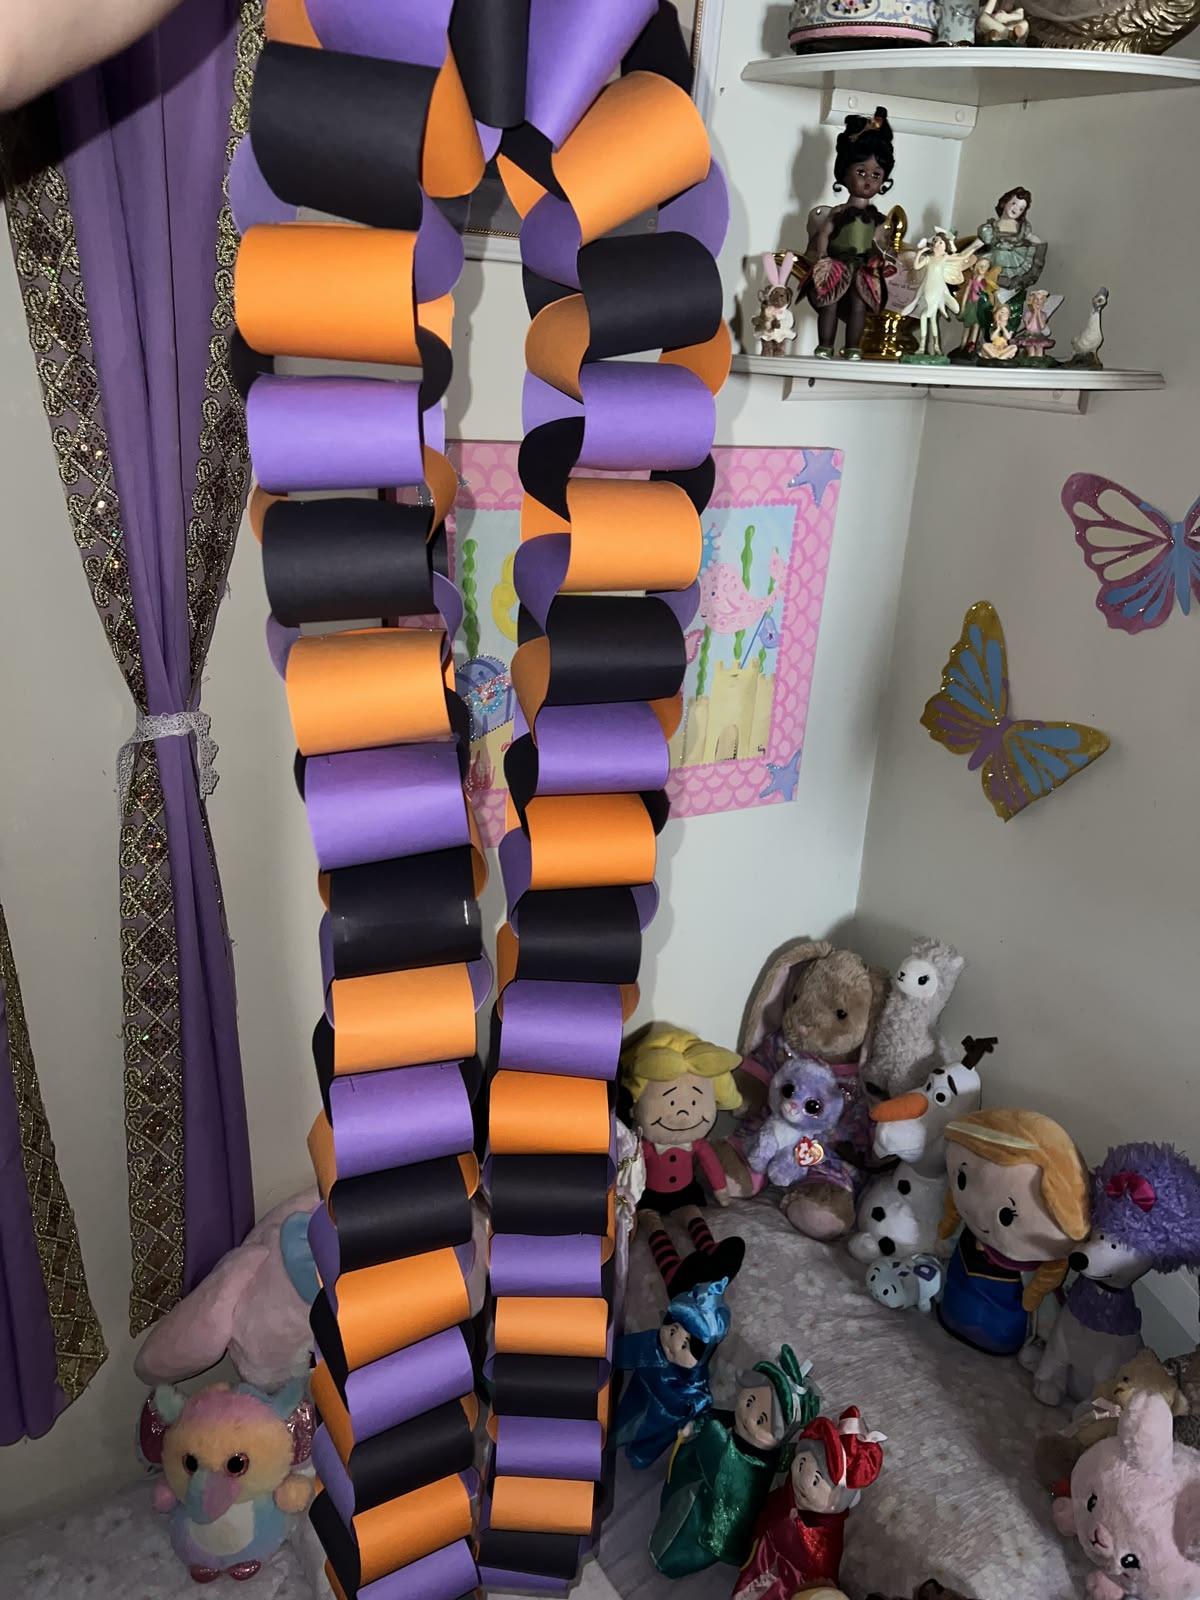
Remember those paper chains you probably made as a kid? They are still fun, and Halloween gives you a good excuse to bring them back.
Cut strips of orange, black, purple, white, and green paper.
Take one strip, make a loop, and glue or staple the ends together. Put another strip through the first loop and make another loop. Keep going until you have a long chain.
Older kids can do most of this themselves. Younger kids can help choose the colors and hand you the paper strips.
Once the chain is finished, hang it across a wall, doorway, bedroom, or table.
You can make a short chain for a small space or keep adding loops until you have one long enough to decorate the room.
This is also a great group craft. Give every child a pile of paper strips and let everyone make a few loops. Then join all the chains together at the end.
For more Halloween fun that works well at a party, you can also try some Halloween Party Activities for Kids.
What you need:
• Colored paper
• Scissors
• Glue or stapler
• Ruler
• Pencil
16. Coffee Filter Ghost
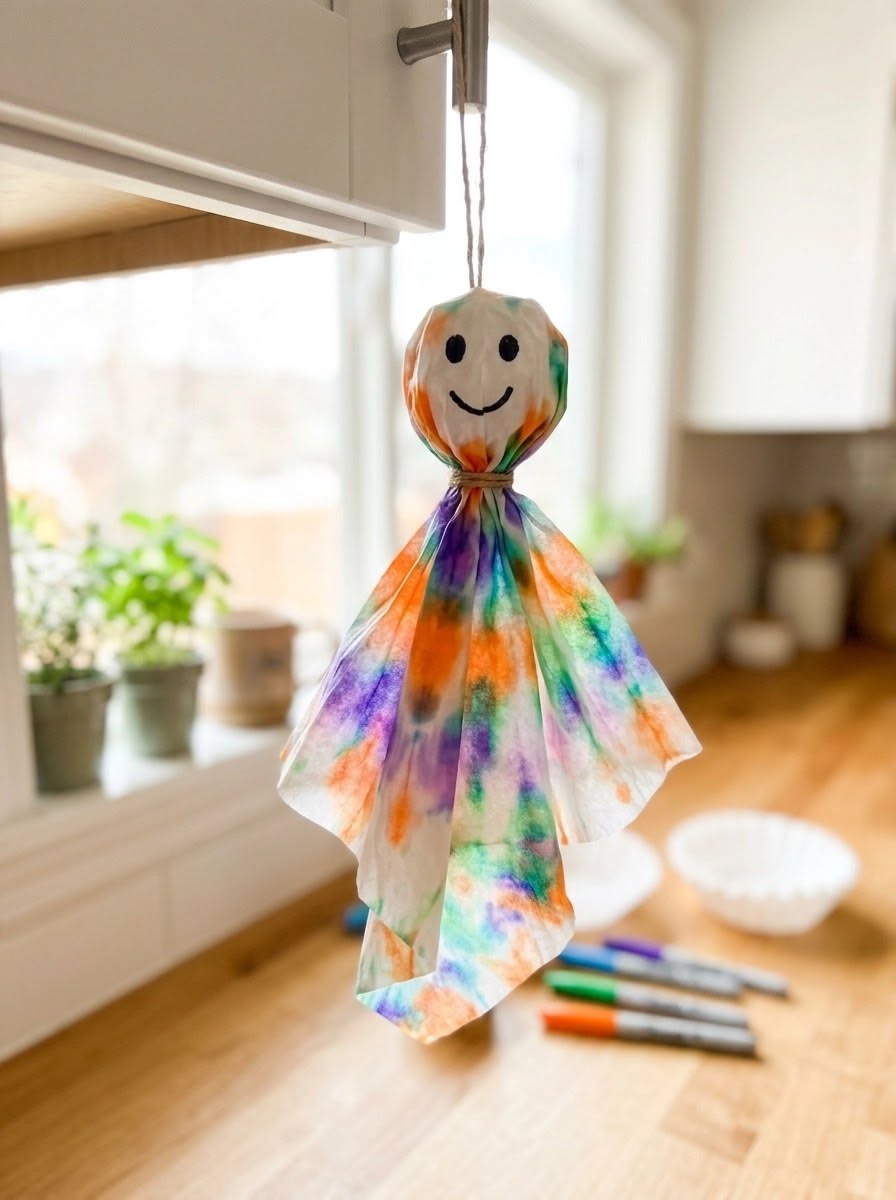
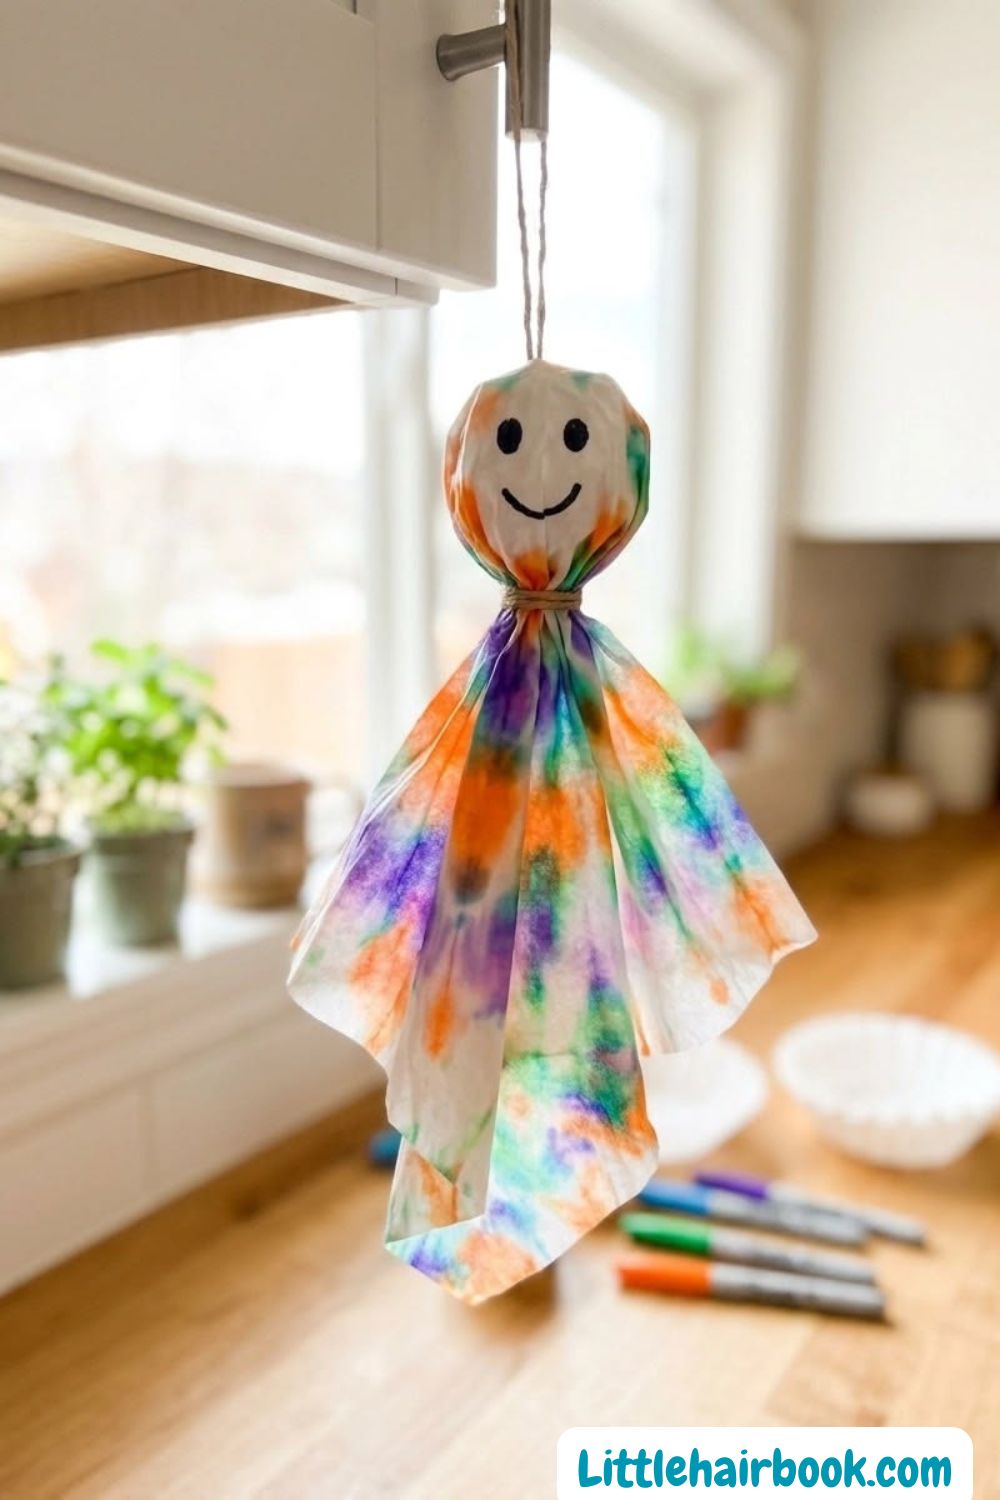
Coffee filters can make surprisingly cute ghosts because the thin paper gives them a soft, floaty look.
Take a white coffee filter and flatten it out on the table. Place a small cotton ball or crumpled piece of tissue paper in the middle.
Gather the coffee filter around the cotton ball and twist it underneath to create the ghost’s head.
Tie the bottom of the head with a small piece of string or ribbon.
Now give your ghost a face. Draw two black eyes and a little mouth with a marker.
You can leave the ghost plain, or let the kids decorate it with small paper bows, hats, or colorful details.
To turn the ghosts into decorations, tie a longer piece of string around the top and hang them around the room.
They look especially cute when you make several and hang them together.
This is a nice choice for kids who do not enjoy scary Halloween decorations because you can make the ghosts look more funny and friendly than spooky. For more gentle ideas, take a look at these Fun Halloween Ideas for Kids Who Don’t Like Scary Things.
What you need:
• White coffee filters
• Cotton balls
• String or ribbon
• Black marker
• Optional colored paper
• Glue
17. Halloween Monster Rocks
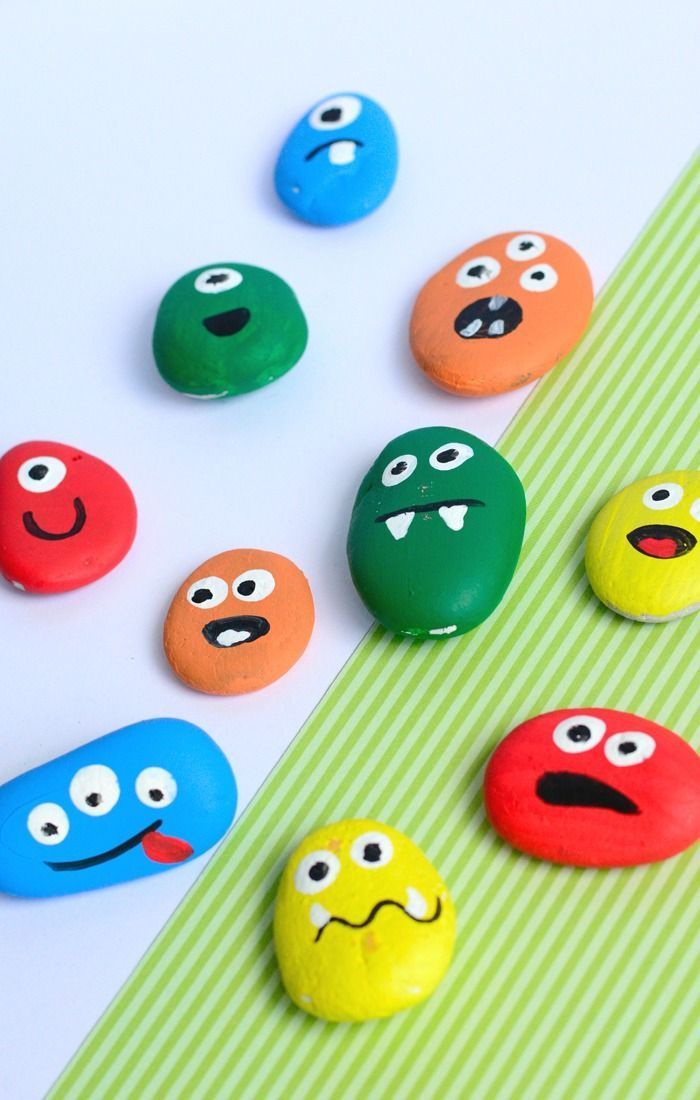
If you have a few smooth rocks outside, bring them inside and turn them into tiny Halloween monsters.
Wash the rocks first and let them dry completely. Give each child a few rocks and let them paint them in different colors.
Green can make a funny monster, orange can become a pumpkin, and black can turn into a little Halloween creature.
Once the paint dries, add googly eyes and draw mouths with a marker. You can even glue on tiny paper ears, horns, or teeth.
There is no need to make every rock look the same. Let the kids come up with their own creatures.
When they are finished, place the rocks on a shelf, windowsill, or table. They can also use them as little decorations in their bedrooms.
If you want to make the activity last longer, turn it into a small game afterward. Hide the painted rocks around the house and let the kids search for them.
That gives you a craft and a simple Halloween activity in one.
What you need:
• Smooth rocks
• Washable paint
• Paintbrushes
• Googly eyes
• Glue
• Markers
• Optional paper for horns, ears, and teeth