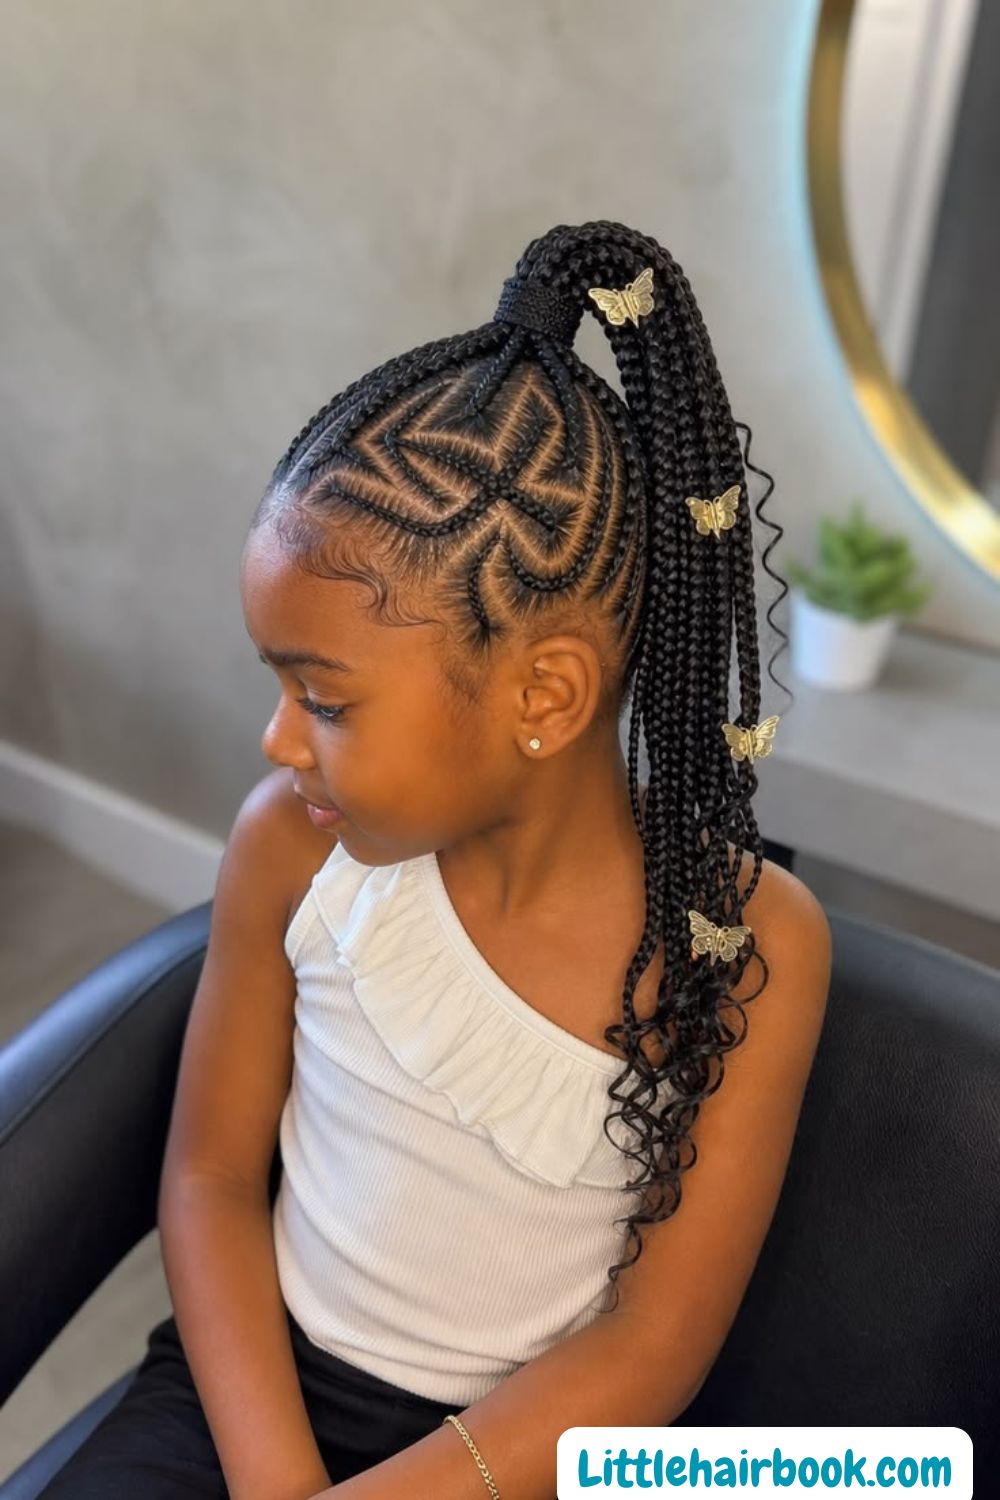
There is genuinely no better combination in children’s hair care than a well-installed braid on a Sunday evening and a school week that practically takes care of itself from Monday through Friday. No daily restyling, morning battles and no complicated products. Just neat, protected hair that shows up looking intentional every single day.
The thing about braids specifically is that they work across almost every hair type, every age group, and every skill level. Whether you are a parent who has been braiding hair for years or someone who is just learning, there is a braided style on this list that you can achieve and that will genuinely make your school mornings easier.
We covered natural hair school styles in the last post on Little Hair Book and if you missed it, easy school hairstyles for natural hair is a great companion to this post since many of the best braided styles for school work particularly well on natural hair textures. Today though, we are covering braided styles across all hair types. Simple, practical, and genuinely beautiful braids for every child heading to school.
What You Need Before You Start Braiding
Getting the right tools and products ready before you sit down to braid makes the whole process faster and the result neater.
A rat tail comb for creating clean, precise parts. Clean parts make braids look neat and intentional. Messy parts make even well-done braids look sloppy.
A wide-tooth comb for detangling before braiding. Never braid over tangles. Tangles locked inside a braid become significantly harder to remove when the style comes down.
Leave-in conditioner or moisturizer to apply to each section before braiding. Braiding dry hair causes breakage at every point where the braid puts tension on the strand. Moisturized hair is more flexible and braids more easily without snapping.
Light oil to smooth each section and add shine. A little oil on each section also helps the braid look neater and more polished.
Small elastics or scrunchies to secure the ends of each braid. Use fabric elastics rather than metal-clasped ones. Metal clasps snag and break the hair at the point where they are wrapped.
Edge control for smoothing the hairline around the braids. Neat edges make any braided style look finished and polished rather than rushed.
Having all of these within reach before you start means you are not stopping mid-style to search for something, which keeps the process flowing and the hair from drying out between sections.
Bookmark this post: school hairstyles that help prevent hair breakage
1. Classic Three Strand Braid
The classic three strand braid is the foundation of everything in this post. Every parent should be able to do this braid quickly and neatly because it is the starting point for so many other styles.
What it looks like: Three equal sections of hair braided over and under each other alternately from root to tip, creating the classic interwoven pattern that everyone recognizes as a braid.
How to do it: Gather the hair into the desired position. Divide into three equal sections. Cross the right section over the center section. Then cross the left section over the new center section. Continue alternating right over center, left over center all the way to the ends. Secure with a small elastic.
Why it works for school: A classic three strand braid stays in place all day through every activity. It takes under three minutes on detangled hair and looks neat and intentional. On naturally textured hair, the braid holds even better because the texture grips itself as the braid sets throughout the day.
Variations to try: Two braids instead of one. Three braids instead of two. A braid with a ribbon woven through it for special school days. The classic braid is the most versatile foundation style in children’s hair care.
2. Dutch Braid
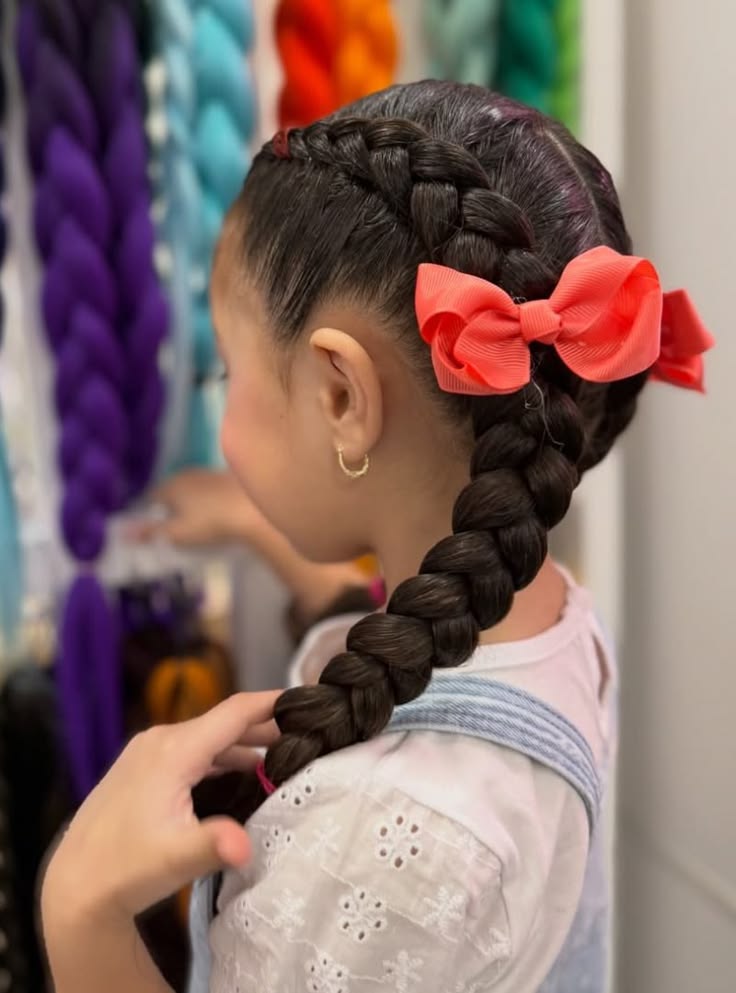
A Dutch braid is essentially a reverse French braid. Instead of crossing sections over the center, you cross them under, which makes the braid pop outward from the scalp and appear three-dimensional.
What it looks like: A braid that sits on top of the hair rather than lying flat against it, running from the crown to the nape or from one side of the head to the other. The raised braid pattern has a beautiful, defined look that appears more complex than it actually is.
How to do it: Start with a section of hair at the crown. Divide into three pieces. Cross the right section under the center rather than over. Then cross the left section under the new center. As you continue down, pick up new sections of hair from the scalp and add them to each side before crossing under the center. Continue until all the hair is incorporated and braid the remaining length to the ends.
Why it works for school: A Dutch braid is more structured and prominent than a French braid which means it holds its shape even better throughout a school day. It also looks more elaborate and polished than a regular braid despite taking only slightly more time to create.
Tips for natural hair: Dutch braids work particularly beautifully on natural hair because the texture of the hair grips itself during the braiding process, making the braid tighter and longer-lasting than on straight hair.
For more on how to keep braided styles moisturized and healthy throughout a school week, how to keep children’s hair healthy on Little Hair Book covers the maintenance habits that keep the hair in good condition while in any school style.
3. French Braid
The French braid is a timeless school style that looks elegant and polished while being genuinely practical for an active school day.
What it looks like: A braid that incorporates all the hair from the scalp as it moves down the head, lying flat against the scalp and creating a smooth, neat appearance from hairline to ends.
How to do it: Start with a small section at the crown. Divide into three pieces. Cross the right section over the center, then the left section over the new center. Before each cross, pick up a thin section of hair from the scalp on that side and add it to the section before crossing. Continue down the head until all the hair is incorporated. Braid the remaining length to the ends and secure.
Why it works for school: A French braid incorporates every strand of hair so nothing is left loose to tangle or fall in the face during the school day. It lies completely flat against the head which makes it comfortable for sitting at a desk and sleeping in at night when covered with a satin bonnet.
Practice makes perfect: The French braid feels awkward in the beginning because the picking-up-sections motion is not instinctive. Practice on a non-school day a few times and it quickly becomes second nature. Once you have the motion locked in, a French braid takes under five minutes on detangled hair.

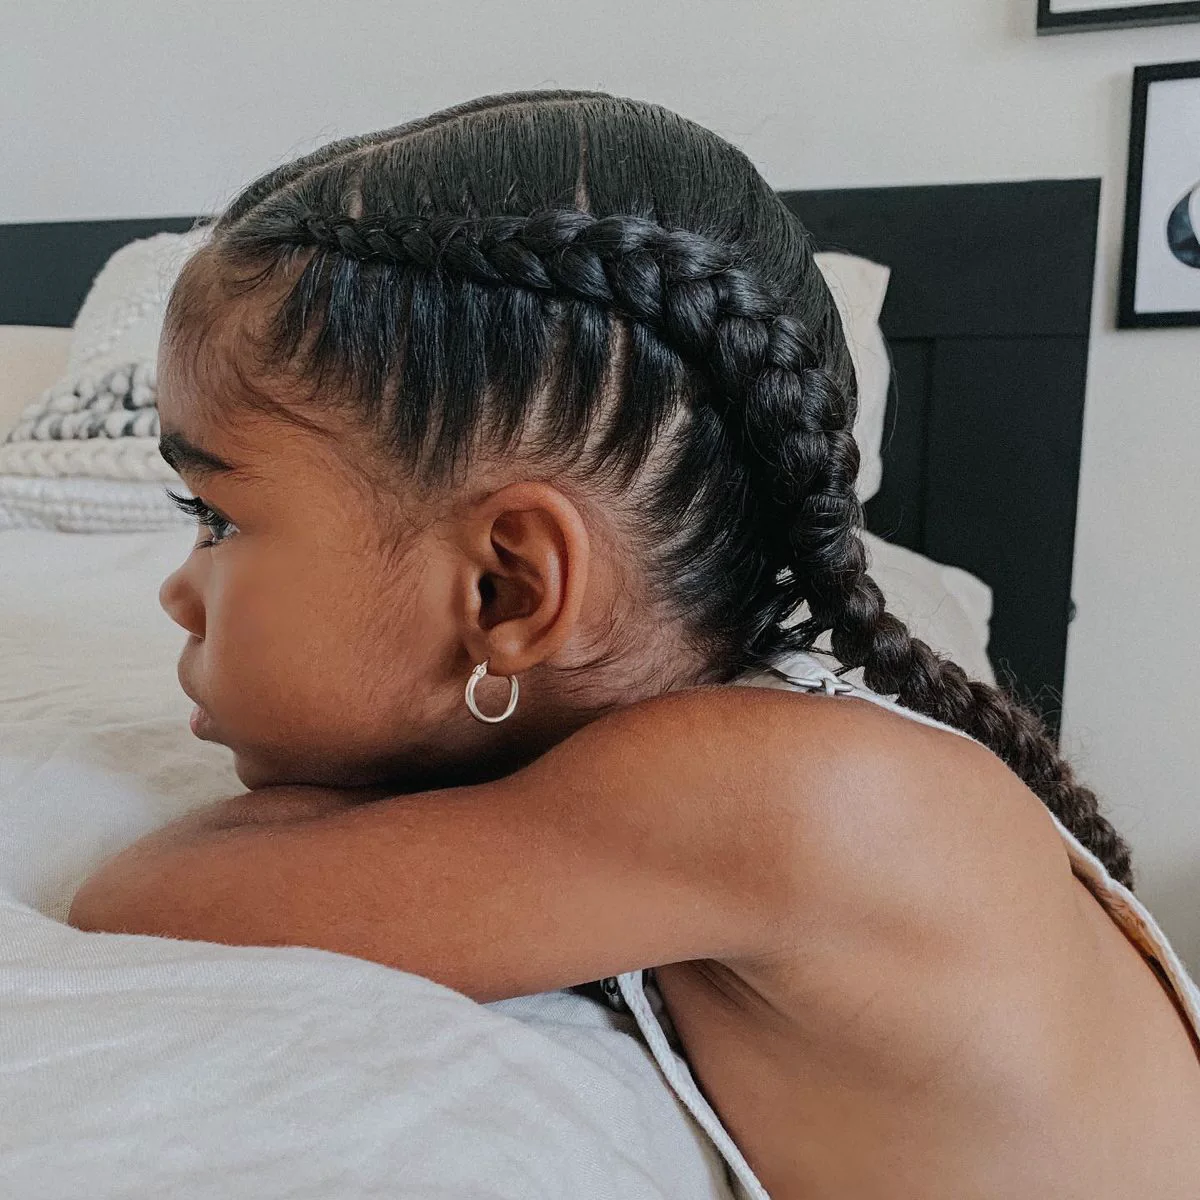
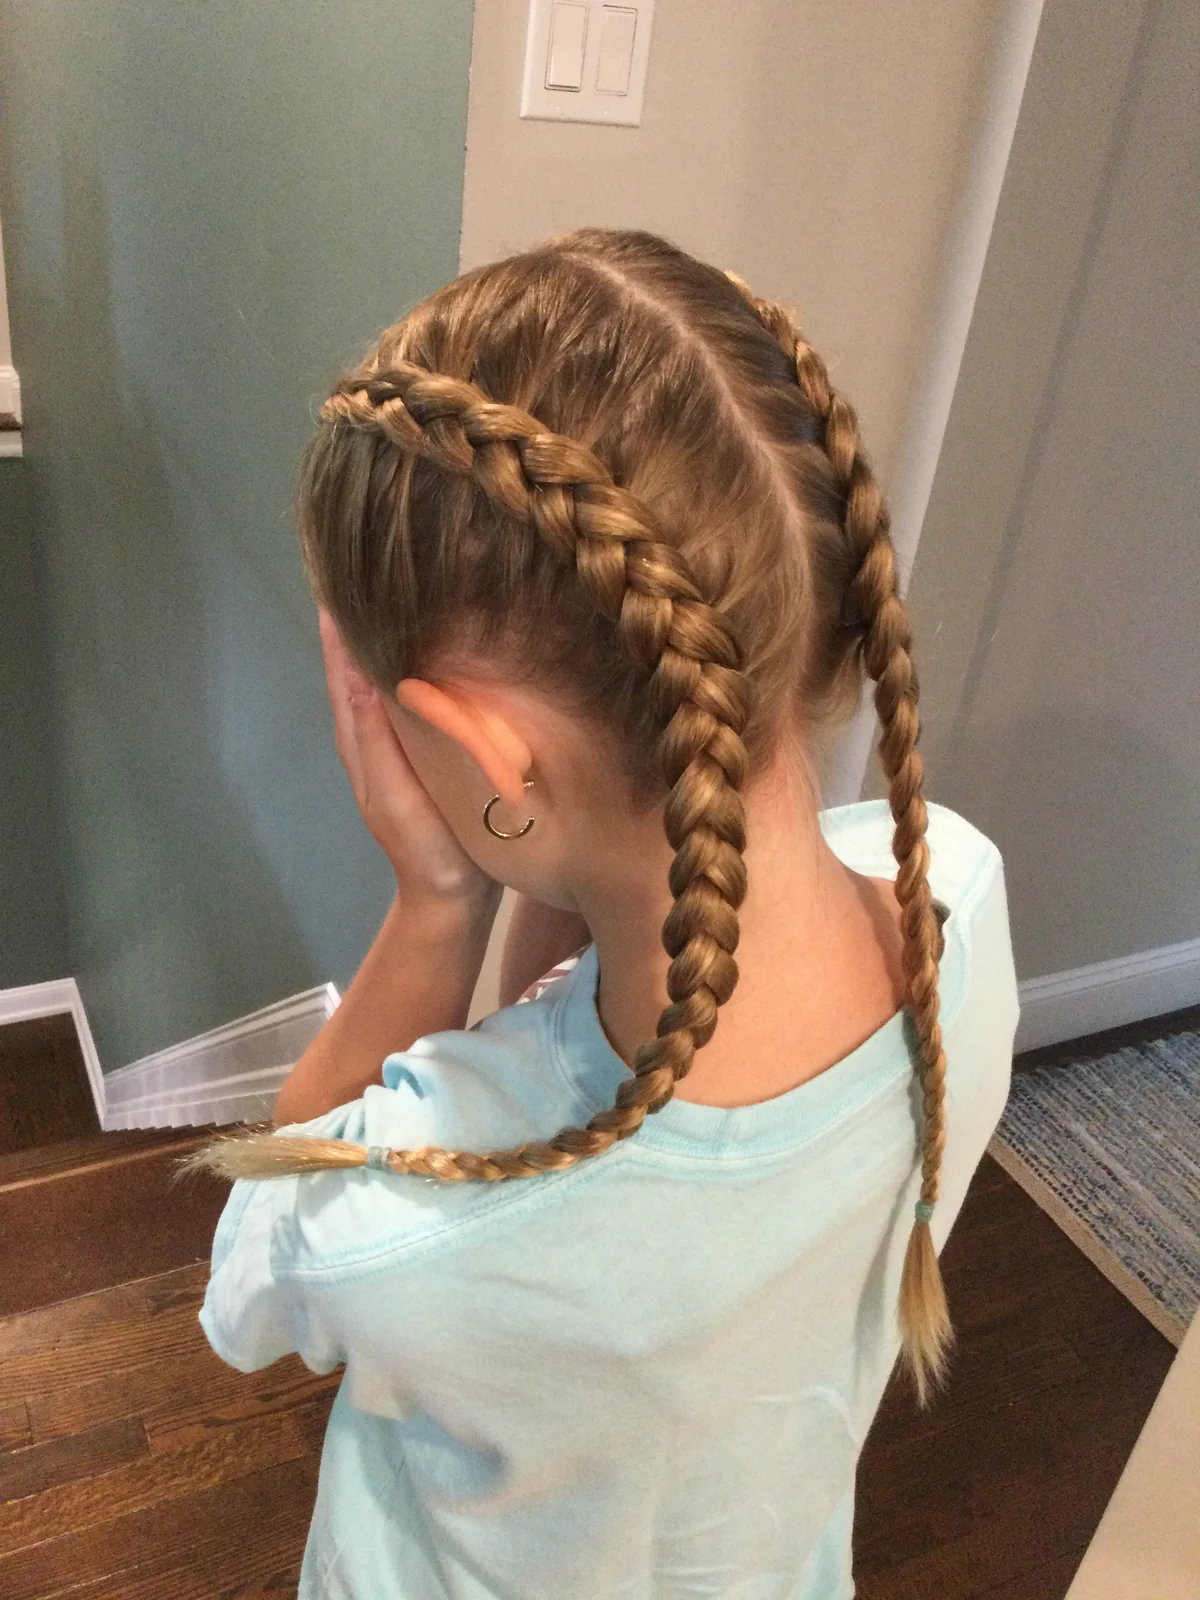
4. Two French Braids
Two French braids parted down the center is one of the most classic and practical school styles across all hair types. It looks neat, it is symmetrical, and it holds up through absolutely everything a school day involves.
What they look like: Two French braids parted down the center running from the front hairline to the nape on each side of the head, lying flat against the scalp throughout their length.
How to do them: Part the hair precisely down the center from front to back. Clip one side away while working on the other. French braid the first side from the front hairline downward, picking up sections from the scalp as you go. Braid the remaining length at the nape and secure. Repeat on the other side making sure the tension and tightness matches the first side.
Why they work for school: Two French braids together keep every strand of hair on both sides of the head completely controlled and protected throughout the school day. They are symmetrical and neat from every angle and they lay flat enough to be comfortable during every school activity.
How long they last: Two French braids with nightly bonnet protection last three to five days on most hair types. They can be refreshed each morning by smoothing any flyaways with a tiny amount of edge control and re-smoothing the center part.
5. Lemonade Braids
Lemonade braids are side-swept cornrows that run horizontally across the head from one side to the other rather than straight back. They offer a more modern and stylish take on traditional cornrows.
What they look like: Cornrows that run from one side of the head across to the other in a horizontal direction, all sweeping the same way. They create a very sleek, directional look that is distinct from straight back cornrows.
How to do them: Start on one side of the head, beginning at the front hairline. Cornrow horizontally across the head in rows running from the starting side to the opposite side. Each row sits below the previous one. Keep the rows even and the tension consistent across the entire head. Secure the end of each row at the opposite side of the head.
Why they work for school: Lemonade braids lay completely flat against the scalp and stay neat through every school activity just like traditional cornrows. The horizontal direction gives the style a different and more modern aesthetic while offering exactly the same protective and lasting benefits as straight back cornrows.

6. Two Braids Into a Bun
This style combines the neatness of two braids with the elegance of a bun, creating a school style that looks polished enough for picture day but is simple enough for any Monday morning.
What it looks like: Two braids parted down the center that are coiled and pinned into a bun at the back of the head rather than hanging loose. The result is a neat, contained updo that looks much more elaborate than the technique requires.
How to do it: Part the hair down the center. Braid each side from the front hairline or the nape, depending on preference. Once both braids are done, coil them both around a central point at the back of the head. Pin each braid securely with bobby pins. Secure the whole bun with a scrunchie. Smooth the center part and edges.
Why it works for school: The bun version of two braids is even more contained than the hanging version because the ends of the braids are tucked away inside the bun. The hair has no loose ends to catch on anything or come undone during an active school day. It also works beautifully for school events and picture days when a neater look is desired.
For more on styles specifically designed for toddlers and younger children who need simpler versions of these braided styles, back-to-school hairstyles for toddlers and preschoolers on Little Hair Book covers age-appropriate braided styles for the youngest school-goers.

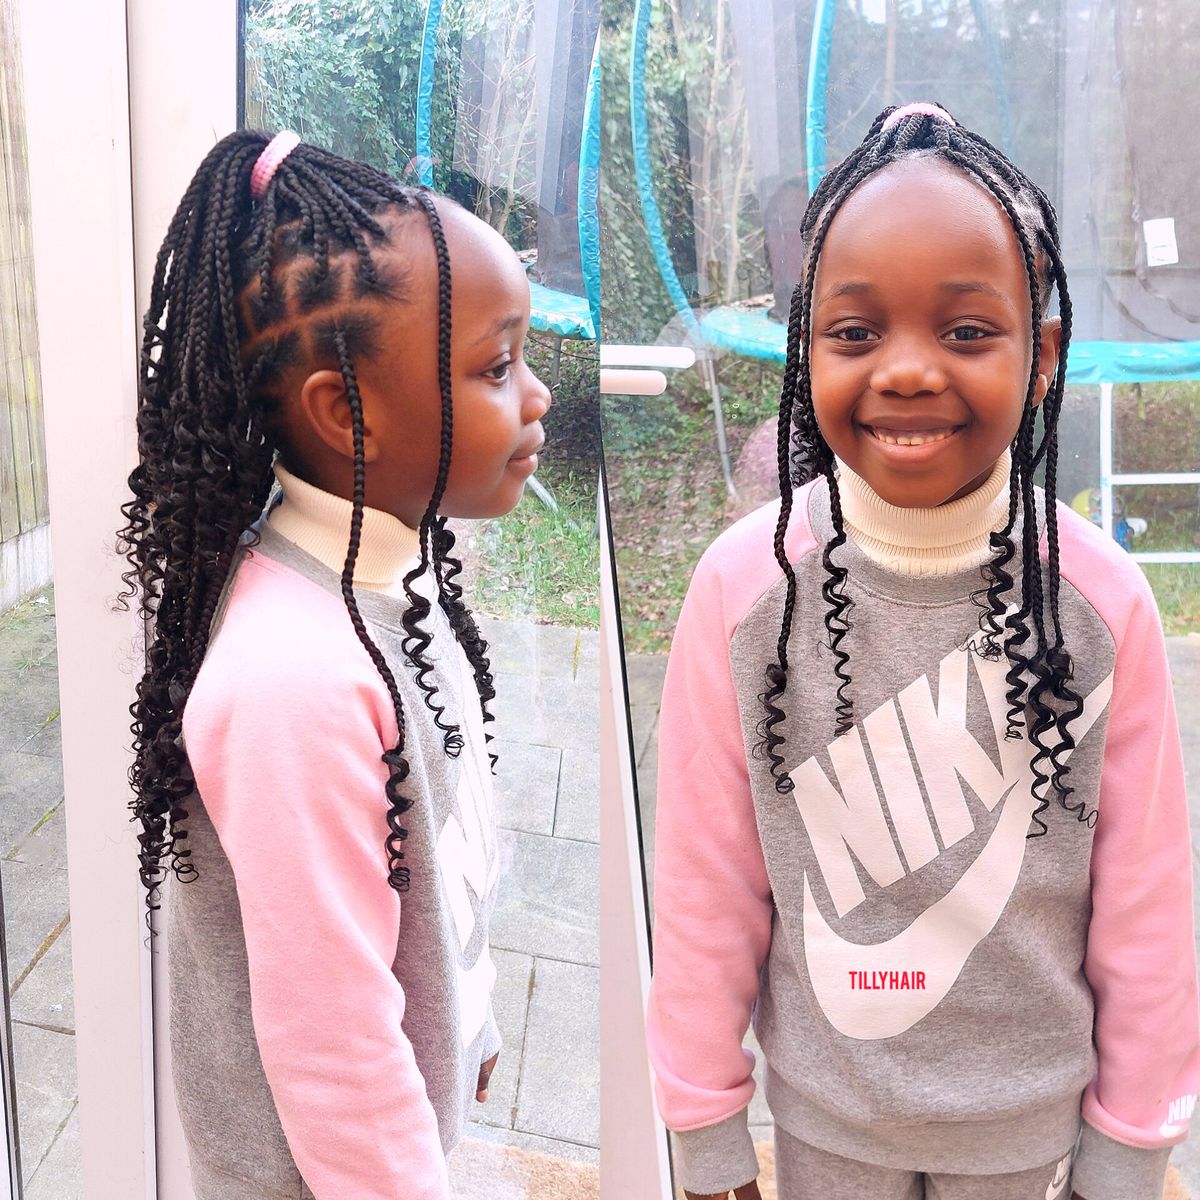
7. Box Braids in a Ponytail
If your child already has box braids installed, gathering them into a ponytail creates a completely fresh and different school look in under two minutes.
What it looks like: Box braids gathered into a high, mid, or low ponytail and secured with a large scrunchie. The braids hang from the ponytail holder in a neat, uniform way that looks very polished.
How to do it: Apply a small amount of oil to the scalp along the braid parts. Gather all the box braids into a ponytail at the desired height. Secure with a large, strong scrunchie that can hold the weight of the braids without snapping. Smooth the edges with edge control. Take one braid and wrap it around the scrunchie for a polished finish.
Why it works for school: A box braid ponytail gives a completely different look from the same installed style without disturbing or loosening the braids themselves. The ponytail keeps the braids contained and off the face throughout the school day while adding a neat, intentional appearance to an already protective style.
Variations to try: High ponytail for a fun, energetic look. Low ponytail for a classic, polished appearance. Side ponytail for something different midweek. Each variation looks like a completely different style from the same box braid installation.
8. Cornrow Ponytail
Cornrows feeding into a ponytail is a hybrid style that combines the flat, neat appearance of cornrows with the ease of a ponytail at the back.
What it looks like: Cornrows running from the front hairline toward the crown or nape where they all feed into one ponytail. The cornrows are neat and flat at the top while the ponytail at the back provides movement and variety.
How to do it: Cornrow all sections of the hair directing them toward the center back or the nape. As each cornrow reaches the gathering point, secure all the cornrows together into one ponytail using a strong scrunchie. Leave the ponytail hanging or style it further into a bun or puff.
Why it works for school: The cornrowed sections stay completely neat and flat throughout the entire school day. The ponytail at the back adds movement and a slightly less structured look to balance the neatness of the cornrows. Together they create a style that is both protective and practical for school.
How long it lasts: A cornrow ponytail lasts the full school week with daily edge smoothing and scalp oiling. The ponytail section may need a light refresh on day three or four but the cornrow sections stay neat throughout.
For more on how to make any braided school style last longer and look freshly done throughout the school week, how to make your child’s school hairstyle last longer on Little Hair Book covers all the maintenance tips and nighttime habits that extend the life of any style.

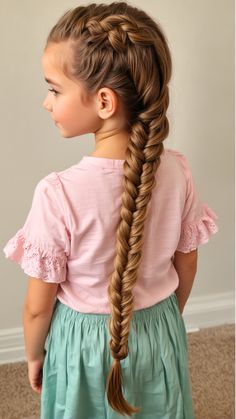
9. Fishtail Braid
The fishtail braid looks incredibly intricate and impressive but is actually quite simple once you understand the two-section technique it uses rather than the traditional three-section braiding motion.
What it looks like: A braid with a herringbone or woven pattern created by crossing thin sections of hair from each side across the center. It is more textured and detailed looking than a classic three strand braid and gets a lot of compliments at school.
How to do it: Divide the hair into two equal sections rather than three. Take a very thin piece from the outside edge of the right section. Cross it over to join the left section. Then take a very thin piece from the outside edge of the left section and cross it over to join the right section. Continue alternating this motion all the way to the ends. The thinner the sections you take each time, the more detailed and intricate the pattern looks. Secure with a small elastic.
Why it works for school: The fishtail braid looks elaborate enough to generate compliments at school while being genuinely achievable at home with a little practice. It also holds its shape very well throughout the day because the thin sections cross each other in multiple places, creating a very secure interlocking structure.
Tips for success: Keep the sections you take from each side consistently thin and consistent. Varying the thickness creates an uneven pattern. Practice the motion a few times on non-school days until it becomes automatic.
10. Pull-Through Braid
The pull-through braid creates the appearance of a braid without actually using a traditional braiding technique, making it achievable for parents who find regular braiding difficult.
What it looks like: A braid-like structure running down the back of the head that looks similar to a fishtail or Dutch braid but is created entirely with ponytails rather than braiding sections.
How to do it: Start with a small ponytail at the crown secured with a scrunchie. Take a second section of hair directly below the first ponytail. Split the first ponytail in two, pull the second section of hair up through the split, and secure the second section with its own scrunchie close to the scalp. Repeat this process down the length of the hair, always pulling the new section up through the split of the previous ponytail. Secure the final ponytail at the ends.
Why it works for school: The pull-through braid stays secure all day because each section is individually secured with its own scrunchie. It also works on almost every hair type from straight to natural coily hair and requires no traditional braiding skill. Parents who struggle with regular braiding find this style much more achievable.
For more on which protective school styles work best for every hair type including the braided styles in this post, low-maintenance school hairstyles for every hair type on Little Hair Book covers the full range of options across straight, wavy, curly, and natural hair.

Maintaining Braided School Styles Through the Week
Installing a braided style on the weekend is only half the work. Maintaining it properly through the school week is what makes it look neat on Friday as it did on Sunday.
Apply oil to the scalp along the parts every two to three days. This keeps the scalp from becoming dry and itchy which is the main reason children disturb their braided styles by scratching. A light oil applied directly to the scalp and massaged in gently takes under two minutes and makes a significant difference in how comfortable the style is to wear.
Smooth the edges every single morning. The edges are the most visible part of any braided style and the first place that shows wear. A small amount of edge control applied with a soft bristle brush each morning keeps the entire style looking freshly done.
Cover with a satin bonnet every night without exception. The satin bonnet is what separates a style that looks freshly done on Friday from one that looks worn out by Tuesday. Cotton absorbs moisture from the braids and creates friction that causes frizz along each braid. Satin eliminates both problems completely.
Mist the braids lightly with water every two to three days and apply a small amount of leave-in conditioner or braid spray to keep the hair underneath the braids moisturized. The hair underneath a braided style still needs moisture even though it is not exposed. Neglecting this step leads to dry, brittle hair when the style comes down even if the style itself looked beautiful throughout the week.
Taking down braided styles gently is just as important as installing them carefully. Work section by section, loosening ends before unraveling, and follow the takedown immediately with a thorough deep conditioning session before installing any new style.